
To make a DIY truck bed ladder or step, start by choosing affordable materials like lumber, plywood, and metal hardware for strength and flexibility. Plan your design carefully, including support beams, crossbars, and curved elements for stability. Secure everything tightly with lag screws or bolts, and add non-slip surfaces for safety. Finish with weatherproof paint or stains to protect it from the elements. If you keep going, you’ll discover detailed steps to build a sturdy, custom solution.
Key Takeaways
- Use sturdy materials like 2x4s, plywood, and metal brackets for a durable, safe ladder or step structure.
- Plan your design around truck bed dimensions and mounting points for secure attachment.
- Secure the ladder using existing stake holes, tie-downs, or metal flanges with lag screws or U-bolts.
- Add non-slip features such as grip tape, textured paint, or rubber pads for safety in wet conditions.
- Finish with weatherproof coatings and smooth edges for durability, safety, and a professional appearance.
Selecting Suitable Materials for Your Step or Ladder
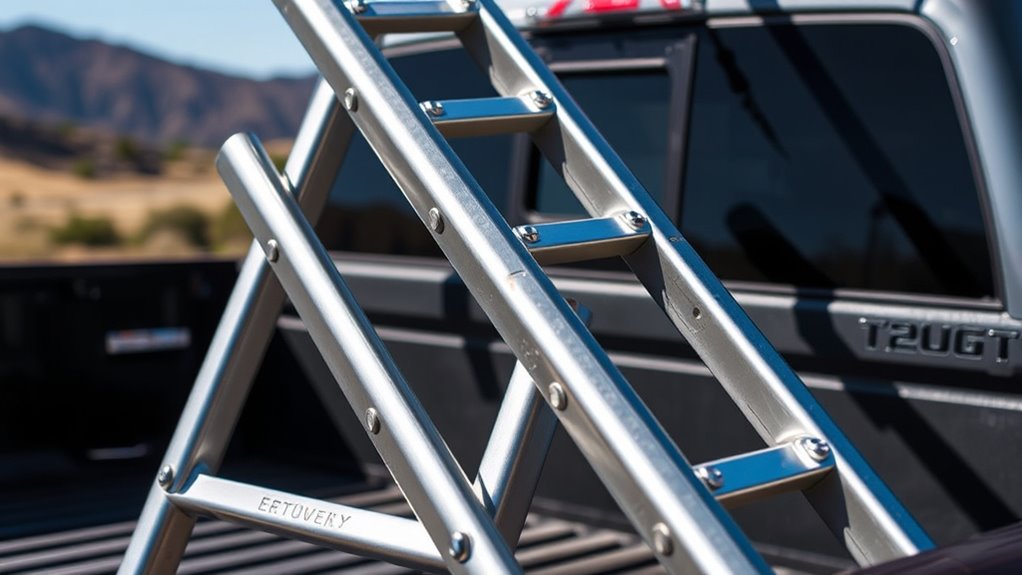
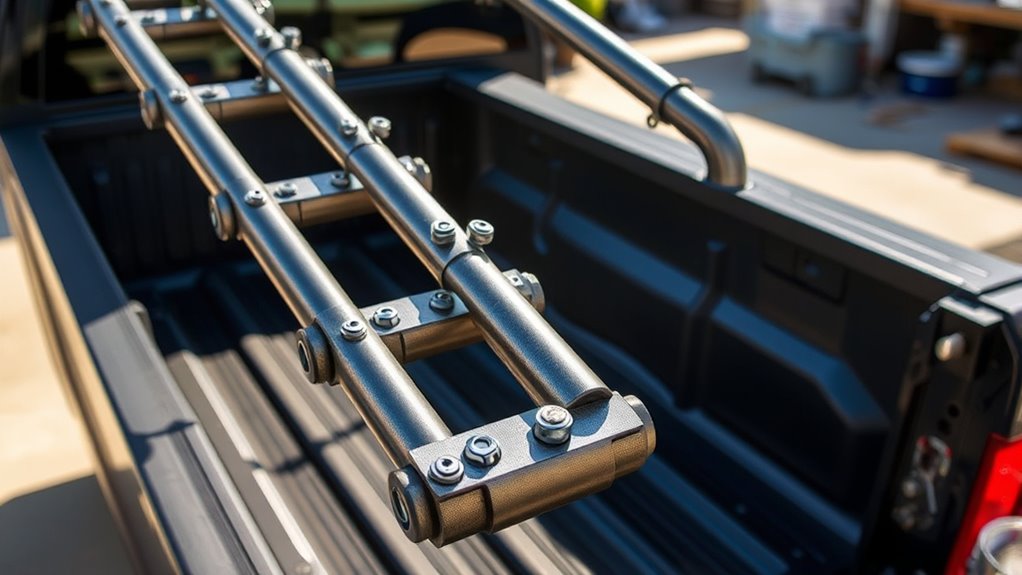
Choosing the right materials is essential for building a sturdy and durable truck bed ladder or step. You want materials that can handle weight, resist weather, and stay secure over time. Common choices include 2×4 lumber and plywood, which are affordable and easy to work with. For support and reinforcement, use 1×3 wood strips. Metal parts like plumbing pipes, PVC conduit, and pipe flanges add strength and flexibility for mounting. Fasteners such as lag screws, wood screws, and construction adhesive ensure solid connections. For weather protection and appearance, consider black paint, Spar urethane, or wood stain. Additional hardware like U-bolts and nylon nuts help secure the structure. Select materials that balance strength, weight, and cost, making your DIY project both reliable and manageable. Incorporating material durability considerations can help ensure your ladder or step withstands the test of time and environmental conditions.
Planning the Design and Structural Layout

To create a strong and functional truck bed ladder or rack, you need to carefully plan your design and structural layout before starting construction. Begin by measuring your truck bed dimensions and identifying suitable mounting points, such as stake holes or tie-downs. Decide whether you prefer a wood-only structure or incorporate metal tubing for added strength and durability. Sketch your design, considering the ladder’s height, width, and step spacing to ensure safety and comfort. Think about weight distribution and load-bearing capacity, choosing thick plywood or doubled-up 2×4 beams for support. Plan how components will connect—using lag screws, bolts, or brackets—so assembly is straightforward and secure. Incorporating structural integrity into your design ensures your ladder or rack will withstand heavy loads and rough conditions. A detailed plan prevents mistakes and ensures your ladder or rack fits perfectly and functions safely.
Building Sturdy Support Beams With Lumber

Building support beams with lumber forms the backbone of a sturdy truck bed ladder or rack. Start by selecting high-quality 2x4s, and glue two together for extra strength. Secure them with lag screws or wood screws, ensuring tight joints. For added stability, reinforce beams by attaching metal brackets or gussets at critical points. When constructing horizontal supports, cut plywood strips to fit the length of your truck bed, and attach them firmly to the beams with screws and construction adhesive. Be mindful of the truck bed’s shape; curve plywood layers to match its contours for better load distribution. Always double-check that your beams are level and securely fastened, as they’ll bear the weight and keep your ladder or rack stable during use. Proper construction techniques ensure the durability and safety of your DIY project.
Crafting Custom Crossbars for Stability

Crafting custom crossbars is essential for ensuring your truck bed ladder remains stable and secure during use. Start by selecting sturdy plywood or layered plywood sheets to create strong, load-bearing bars. Cut the sheets to the desired length and thickness, then laminate multiple layers for added strength. Shape the crossbars to match your truck bed’s curvature using a jigsaw or router, ensuring a snug fit. Reinforce the joints with construction adhesive and screws for stability. Attach support brackets made from 1×3 wooden strips or metal flanges to distribute weight evenly. Secure the crossbars to the sidewalls or existing tie-down points with lag screws or bolts. Properly crafted crossbars prevent wobbling, providing a safe, reliable foundation for your ladder or step. Additionally, consider load calculations to ensure your setup can handle the weight safely and maintain stability during use.
Shaping and Attaching Curved Support Elements

Shaping and attaching curved support elements guarantees your rack conforms smoothly to the truck bed’s contours and distributes load evenly. Begin by selecting plywood or layered wood strips that match your desired curvature. Use a large-radius template or bend flexible plywood to trace the curve, then cut carefully along the line. Sand edges smooth to prevent splinters. To attach, position the curved supports against the truck bed’s sidewalls, then secure them with wood screws or lag bolts through pre-drilled holes. Reinforce joints with construction adhesive for added strength. Ascertain the support elements follow the bed’s natural shape, providing a seamless fit. Proper shaping and attachment create a stable, load-distributing foundation for your ladder or step, enhancing safety and durability during use. Additionally, ensuring the support components are well-shaped contributes to overall load distribution and the longevity of the rack.
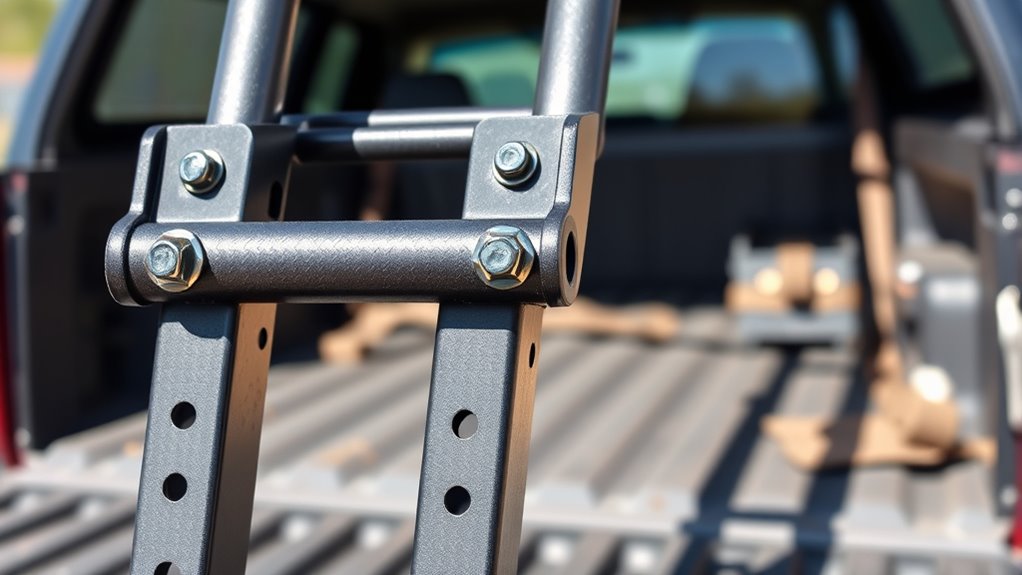
Mounting the Frame Using Existing Truck Bed Points

Utilizing the existing tie-down points and stake holes in your truck bed simplifies the mounting process and helps prevent damage to the vehicle. You can attach your frame using these points with minimal drilling or modification. First, identify strong, accessible tie-downs or stake holes aligned with your ladder or step design. Insert hardware like U-bolts, threaded rods, or lag screws through these openings, securing them with washers and nuts on the underside. For added stability, use metal brackets or pipe flanges attached to wooden supports, then mount these onto the existing points. This method ensures your rack is firmly anchored without drilling into the truck bed sides or bed floor, maintaining the vehicle’s integrity and appearance while providing a solid base for your DIY ladder or step. Additionally, considering backyard transformation essentials can inspire creative ways to enhance your outdoor workspace or storage solutions around your vehicle.
Securing the Ladder or Step With Hardware Fasteners
When securing your ladder or step, choosing the right fasteners is key to safety and stability. You’ll want to take into account factors like material compatibility and load capacity to ensure a secure fit. Proper installation techniques help prevent loosening or failure over time, so follow best practices for a durable, reliable connection. Additionally, selecting appropriate fastener types ensures that your installation remains secure under various conditions.
Choosing Appropriate Fasteners
Choosing the right fasteners is essential to guarantee your DIY truck bed ladder or step is secure and durable. You want fasteners that can handle weight and resist corrosion, especially if exposed to weather. Use heavy-duty lag screws, like 5-inch GRK lag screws, for attaching wooden supports to the truck or frame. For metal parts, stainless steel or galvanized bolts, washers, and nuts prevent rust and ensure strength. When securing crossbars or flanges, select appropriate-sized screws or bolts that won’t strip or loosen over time. If attaching to metal, consider using lock washers or nylon nuts to prevent loosening. Always match fastener size and type to the material and load requirements, ensuring your ladder or step stays firmly in place during use. Incorporating proper fastener selection helps maintain safety and longevity of your DIY project.
Proper Installation Techniques
To guarantee your DIY truck bed ladder stays securely in place during use, proper installation techniques are essential. Begin by locating sturdy mounting points, such as existing stake holes or tie-down points. Use high-quality fasteners like lag screws or heavy-duty wood screws, ensuring they’re long enough to penetrate both the support material and the truck bed frame. If installing on metal, secure with U-bolts or pipe flanges, tightening washers and nuts firmly. Apply construction adhesive at critical joints for added strength. Avoid over-tightening to prevent damage. Double-check alignment before fully tightening fasteners. For extra security, use lock washers or nylon nuts. Properly torqued hardware guarantees your ladder or step remains stable, safe, and ready for repeated use. Incorporating proper hardware selection can further enhance the durability and safety of your installation.
Adding Safety Features and Non-Slip Surfaces
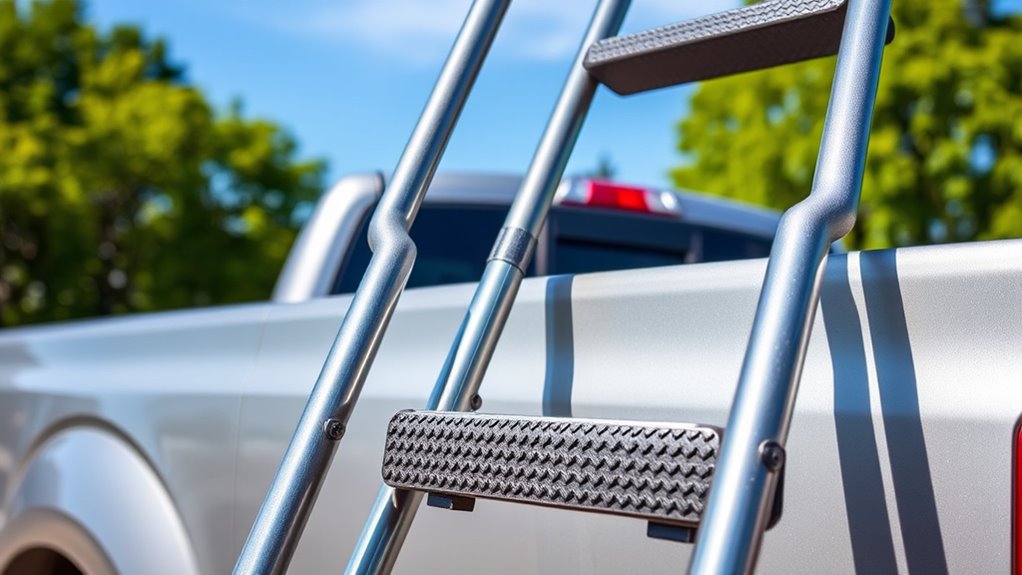
Adding safety features and non-slip surfaces is essential to guarantee secure footing and prevent accidents during ladder use or when climbing onto your truck bed. To achieve this, attach non-slip strips or adhesive grip tape to steps and ladders, providing extra traction even in wet conditions. Consider installing rubber or foam padding on contact points to reduce slipping and protect your truck’s finish. Use textured paints or coatings on wooden surfaces for added grip, especially in wet or muddy environments. Make certain all edges are sanded smooth to prevent injuries. If you use metal components, add rubber caps or non-slip pads at contact points to avoid slipping. These safety enhancements help you climb confidently, reducing the risk of falls and making your DIY ladder safer for everyday use. Additionally, choosing high-traction materials can significantly improve overall safety and durability of your ladder or steps.
Finishing Touches: Painting, Staining, and Weatherproofing
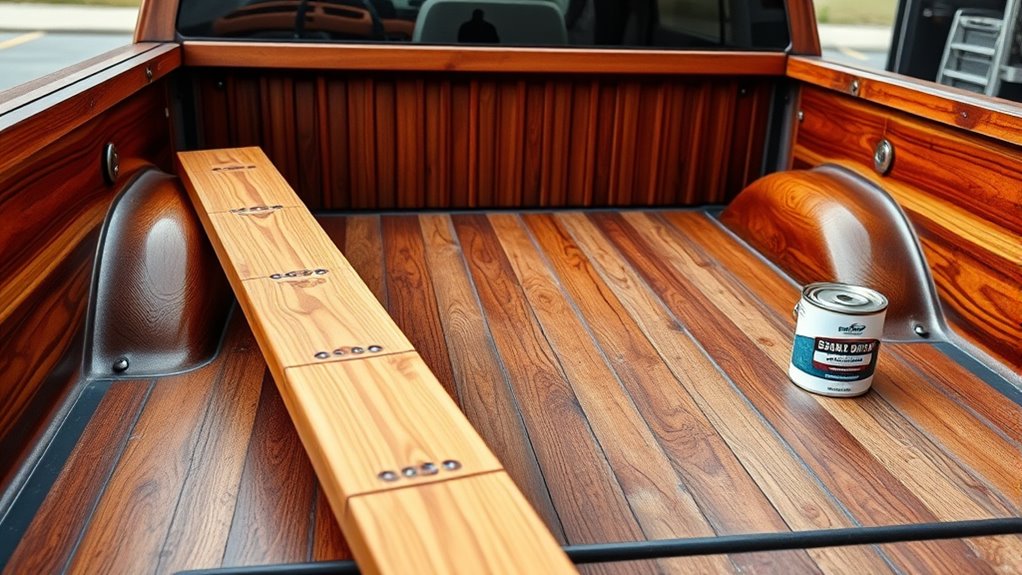
Once you’ve built your ladder, the next step is to choose protective coatings that shield it from the elements. You can also enhance its look with staining or paint, giving it a polished finish. Weatherproofing methods will guarantee your ladder stays durable and functional for years to come.
Choosing Protective Coatings
Choosing the right protective coating for your DIY truck bed ladder is essential to guarantee durability and maintain its appearance over time. Start by evaluating your climate: if you face frequent rain or humidity, opt for weatherproof finishes like Spar urethane or marine-grade sealants. For outdoor exposure, a high-quality outdoor paint or primer designed for wood and metal provides added protection against moisture, UV rays, and corrosion. If you prefer a natural look, stain combined with a clear weatherproof sealer can preserve the wood’s beauty while shielding it from the elements. Confirm all surfaces are cleaned and sanded before applying your chosen coating to achieve a smooth, even finish. Properly applied, these protective coatings will extend your ladder’s lifespan and keep it looking good for years.
Enhancing Aesthetic Appeal
Enhancing the aesthetic appeal of your DIY truck bed ladder begins with selecting the right finishing touches to match your style and environment. You can customize its look and durability with simple finishes that suit your needs. Consider these options:
- Applying a coat of black paint for a sleek, protective finish
- Using wood stain to enhance natural grain and color
- Adding spar urethane for weather resistance and long-lasting shine
- Sanding surfaces smooth before applying any finish
- Using 3D-printed or custom caps to conceal hardware and improve appearance
These finishing touches not only improve the look but also add protection, helping your ladder withstand the elements and regular use. Choose finishes that complement your truck’s style and environmental conditions for a polished, professional result.
Weatherproofing Methods
Weatherproofing your DIY truck bed ladder is essential to guarantee it withstands the elements and maintains its appearance over time. Start by applying a high-quality outdoor paint or stain designed for wood, which creates a protective barrier against moisture, UV rays, and temperature fluctuations. For added durability, consider using a spar urethane finish, which provides excellent weather resistance and helps prevent cracking or peeling. If you prefer a natural look, stain your wood first, then seal it with a clear weatherproof coat. Be sure to sand the surfaces smoothly before applying any finish to ensure proper adhesion. Regular maintenance, like cleaning and reapplying protective coatings every couple of years, will extend the life of your ladder and keep it looking great.
Tips for Disassembly and Adjustments
Disassembly and adjustments are straightforward when you design your DIY truck bed ladder with modularity in mind. To make changes easy, use quick-release hardware and avoid permanent fasteners. Regularly check bolts and screws for tightness, especially after heavy use or weather exposure. If you need to modify the height or angle, loosen bolts, reposition crossbars, or adjust supports as needed. Keep spare hardware handy for quick replacements. Consider labeling parts for easy reassembly. Use adjustable brackets or slotted holes to fine-tune positioning. When disassembling, take photos to remember setup details. Always work on a stable surface and keep hardware organized to prevent losing small parts. These tips help ensure your ladder remains functional and simple to modify over time.
Frequently Asked Questions
How Do I Ensure My DIY Ladder Can Support Heavy Loads Safely?
You guarantee your DIY ladder supports heavy loads safely by using sturdy materials like doubled 2x4s and thick plywood for the steps. Secure all joints with strong lag screws or construction adhesive, and reinforce critical points with metal brackets or flanges. Test the ladder gradually with increasing weight, check for stability, and regularly inspect for wear or damage. Properly anchoring it to your truck bed ensures reliable, safe support during heavy loads.
Can I Modify the Design for Different Truck Bed Sizes?
Of course, you can modify your design for different truck beds—it’s practically a rite of passage. Measure your truck’s dimensions carefully, then adjust the length, width, and mounting points accordingly. Use flexible materials like plywood or adjustable brackets. Remember, a one-size-fits-all approach is just a fancy way of saying “hope it fits.” Customization ensures your ladder’s as practical as it is personalized—because one fit does not rule all.
What Are the Best Practices for Preventing Rust on Metal Parts?
You should coat all metal parts with a high-quality rust-resistant paint or primer before assembly. Applying a clear sealant or protective coating, like a spray-on rust inhibitor, helps prevent moisture buildup. Regularly inspect and clean the metal surfaces, especially after exposure to rain or mud. Consider using stainless steel or galvanized hardware, as these materials resist rust naturally and extend the lifespan of your DIY rack.
How Do I Make the Ladder Steps Slip-Resistant?
Your ladder steps can become slip-resistant faster than a squirrel on a power line by adding textured grips like industrial-grade anti-slip tape or coarse sandpaper. Apply these materials firmly to the surface, especially on painted or smooth wood. You can also drill small, shallow holes or grooves to create traction. Regularly clean and replace the grip materials to keep your steps as secure as a vault door.
Is It Possible to Add Lighting or Reflective Elements for Visibility?
Yes, you can add lighting or reflective elements to improve visibility. Mount LED strip lights along the ladder sides or steps using waterproof brackets, ensuring they’re secure and weatherproof. For reflectivity, attach reflective tape or stickers to the edges and surfaces, especially on steps and support beams. These additions make your ladder safer at night and in low-light conditions, helping you climb or access your truck bed more confidently.
Conclusion
With your DIY truck bed ladder complete, you’ve built a sturdy, reliable way to conquer even the tallest loads with ease. It’s more than just a step—it’s your secret weapon for safety and convenience that’ll last through countless adventures. Now, every climb feels effortless, like you’re walking on air. Get ready to impress everyone with your craftsmanship and enjoy the confidence that comes with a job well done. Your truck just got a serious upgrade!