
To add quick-release mounts to your gear, first choose a mount suited for your device and activity environment. Gather tools like screwdrivers and hardware such as bolts and washers. Prepare the surface by cleaning and marking where you’ll drill holes, then carefully drill and attach the mounting plate. Align the short and tighten securely. Test the mount’s stability and ease of removal, then regularly inspect and maintain it. Keep exploring to learn how to guarantee a secure and lasting setup.
Key Takeaways
- Select a compatible quick-release mount system suited for your gear’s size and weight.
- Prepare the mounting surface by cleaning and marking precise drill holes for secure attachment.
- Attach the mounting plate to your gear following manufacturer instructions, ensuring proper alignment.
- Fix the quick-release base onto the prepared surface, tightening hardware evenly for stability.
- Test the mount’s secure fit and ease of removal, then perform regular maintenance for safety and longevity.
Quick Release Plate, Camera Tripod Mount Arca Swiss QR Plate Fast Claw Clamp Compatible with Canon Sony Nikon Pentax DSLR/SLR/Zhiyun/Feiyu/DJI/Moza Stabilizer, Tripod Slider Gimbal
1 Press to set your camera free, super fast to change your camera/smartphone/action camera between different mounts. A…
As an affiliate, we earn on qualifying purchases.
As an affiliate, we earn on qualifying purchases.
Selecting the Right Quick-Release Mount for Your Needs

Choosing the right quick-release mount depends on your specific gear and how you plan to use it. First, identify the type of device you want to mount—cameras, electronics, or outdoor gear—since different mounts cater to different needs. For quick access and easy removal, lever-action mounts work well for boating or outdoor activities. If you need a secure fit for delicate equipment like cameras, threaded screw mounts are reliable. Magnetic mounts suit mobile devices and accessories, offering convenience. Consider the mounting surface too; some mounts are designed for flat surfaces, while others are specialized for curved or uneven surfaces. Matching the mount type to your gear’s weight, size, and usage environment ensures maximum stability and safety, making your setup more efficient and durable. Additionally, understanding simple systems can help you set up and maintain your mounts more confidently, ensuring your gear stays secure over time.

【2-Pack】 Magnetic Phone Holder for Car Dash【Strong Magnet】 Magnetic Car Phone Holder Mount 【4 Plate】 Phone Holders for Your Car Phone Mount for Car Dashboard Cell Phone Car Mount for iPhone Samsung
Note: Any device even iPhone 17/16/15/14/13/12 must use the included metal plate. Tips: Pasting on the Flat and…
As an affiliate, we earn on qualifying purchases.
As an affiliate, we earn on qualifying purchases.
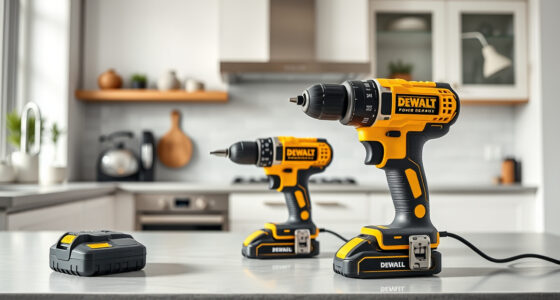
Gathering Essential Tools and Hardware

To guarantee a smooth and secure installation of quick-release mounts, gathering the right tools and hardware is essential. You’ll need specific items to ensure proper attachment and stability. Make a checklist of essential tools like hex keys, screwdrivers, and drill bits. Also, gather hardware such as washers, lock nuts, and thread locking compounds to prevent loosening over time. Having these ready saves installation time and avoids interruptions. Incorporating consistent feedback during installation can help identify any issues early and ensure optimal performance.

Sunlite Fork Mount Bike Block
Great for storage or transportation
As an affiliate, we earn on qualifying purchases.
As an affiliate, we earn on qualifying purchases.
Preparing Your Mounting Surface for Installation
Proper surface preparation is essential to guarantee your quick-release mount stays secure and functions correctly. Start by cleaning the area thoroughly, removing dirt, grease, or debris that can weaken adhesion or cause slipping. Dry the surface completely to ensure a solid bond. Check that the surface is flat and stable; uneven or flexible surfaces can compromise stability. If mounting on wood or composite materials, drill pilot holes to prevent splitting or cracking. For metal or smooth surfaces, lightly sanding or using a primer can improve adhesion. Avoid mounting on surfaces with obstacles or protrusions that could interfere with the gear’s operation. Taking these steps creates a secure foundation, reducing the risk of loosening or damage over time. Additionally, understanding adhesion properties can help select the best mounting method for different surfaces. Proper preparation guarantees your quick-release mount performs reliably.

PROcise Outdoors DEK-it HD Dash Plate for Boat Ranger L/Icon Series (2018+) – Exact Fit for Depth Finders, Fish Finders for Boats, GPS Electronics Fishfinder Mount, Solid Marine Finders Mounting Kit
As an affiliate, we earn on qualifying purchases.
As an affiliate, we earn on qualifying purchases.
Marking and Drilling Mounting Holes Accurately
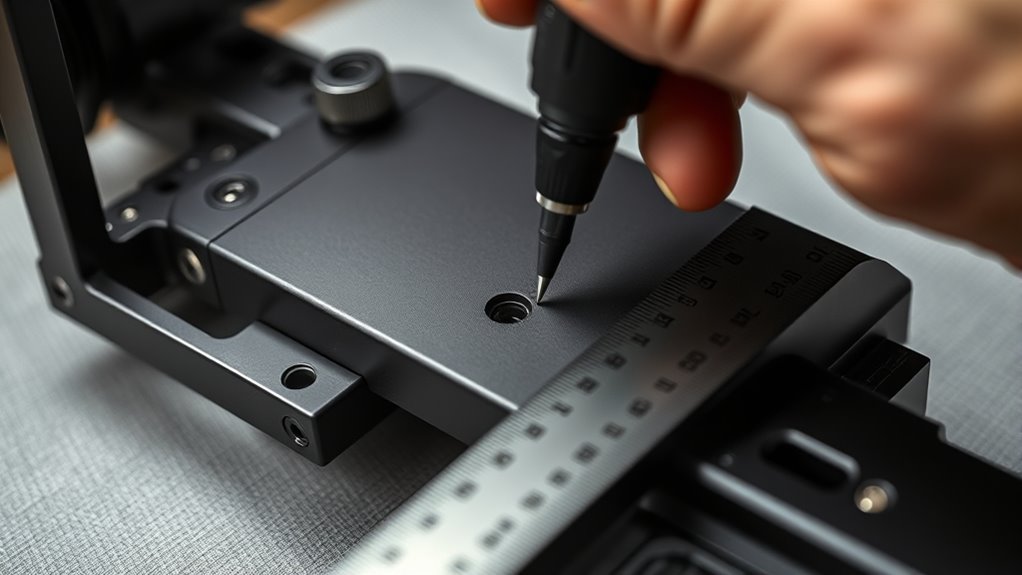
Accurate marking and drilling of mounting holes are essential steps that guarantee your quick-release mount fits securely and functions properly. Start by positioning the mount or plate on the desired surface, ensuring it’s level and aligned correctly. Use a pencil or marker to trace around the mounting holes precisely. Double-check the placement before drilling to avoid errors. Select the appropriate drill bit size based on your hardware—usually specified by the mount manufacturer. Carefully drill the holes straight into the surface, applying steady pressure. Keep the drill perpendicular to prevent angled holes that could weaken the mount. After drilling, clear away debris and verify the fit of your hardware. Precise marking and drilling ensure a tight, secure attachment that withstands vibration and use. Incorporating proper tools and techniques from your outdoor setup experience can help achieve the best results.
Attaching the Mounting Plate to Your Device or Gear

Start by selecting a mounting plate compatible with your device or gear to guarantee a secure fit. Use the proper fasteners and tools, like screws and a screwdriver, to attach the plate firmly. Tighten the screws in a criss-cross pattern to evenly distribute pressure and prevent damage. Ensuring proper installation practices will help maintain safety and functionality over time.
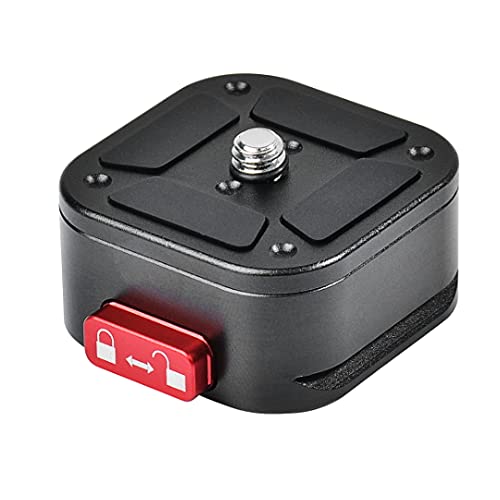
Choose Compatible Mounting Plate
When attaching a mounting plate to your device or gear, it is vital to select a compatible plate that matches both the mounting system and the device’s specifications. Check the manufacturer’s recommendations for your gear to guarantee compatibility with the quick-release system you’ve chosen. Verify the plate’s size, shape, and fastening method align with your device’s mounting points or threaded inserts. For cameras, ensure the plate fits standard screw sizes like 1/4” or 3/8”. If you’re using specialized equipment, confirm the plate’s load capacity and connection type. Using an incompatible plate can lead to unstable mounting or damage. Take the time to double-check specifications and match the mounting plate precisely to your gear’s requirements for a secure, reliable connection. Additionally, choosing European cloud solutions that emphasize durability and security can enhance your setup’s overall stability.
Use Proper Fasteners and Tools
To securely attach the mounting plate to your device or gear, choosing the right fasteners and tools is essential. Use screws or bolts that match the mounting holes and are rated for your application’s weight and environment. For electronics or lightweight gear, small Phillips or hex screws work well. For heavier equipment, opt for larger bolts with washers and lock nuts to prevent loosening. Ensure you have the correct tools—hex keys, screwdrivers, or socket wrenches—to tighten fasteners properly. Apply thread locking compound where vibration is common, like on boat decks or outdoor gear. Avoid overtightening, which can strip threads or crack surfaces. Double-check the fit and securement after installation to guarantee safety and stability during use. Additionally, selecting appropriate lubrication can help maintain fastener integrity over time, especially in harsh conditions.
Follow Criss-Cross Tightening Pattern
Attaching the mounting plate securely to your device or gear requires a methodical approach to guarantee even tension and stability. Use a criss-cross tightening pattern by tightening opposite screws or bolts in sequence. Start by partially tightening one screw, then move diagonally to the screw opposite it, and tighten that one slightly. Continue alternating between these pairs, gradually increasing torque until all fasteners are snug. This method distributes pressure evenly across the mounting surface, preventing warping or uneven attachment. Check your work frequently to ensure the mount remains aligned and secure. Avoid over-tightening, which can damage threads or surfaces. Ensuring proper installation techniques helps maintain the integrity and longevity of your setup. Following this pattern ensures a firm, stable connection, reducing the risk of loosening during use or vibrations.
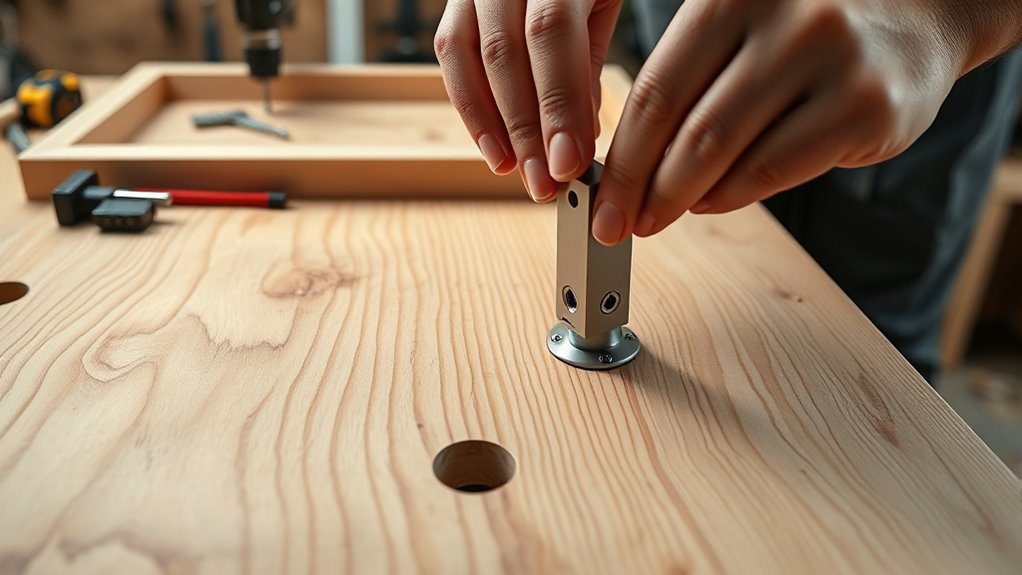
Securing the Base or Mounting Surface

Securing the base or mounting surface is a crucial step that guarantees your quick-release mount stays stable and reliable during use. First, choose a flat, sturdy surface free of obstacles or debris. Mark the hole locations carefully to ensure proper alignment. Before drilling, double-check measurements and use a level if needed. Use appropriate drill bits to create pilot holes, preventing splitting or cracking. Clean and dry the surface to maximize adhesion and prevent slipping. When attaching the mount, use the correct hardware—bolts, washers, and lock nuts—to secure it firmly. Tighten bolts to manufacturer specifications, avoiding overtightening that could damage surfaces or threads. Regularly inspect the mount for signs of wear, corrosion, or loosening, especially in marine or outdoor environments. Ensuring proper mounting surface conditions is essential for long-term durability and safety.
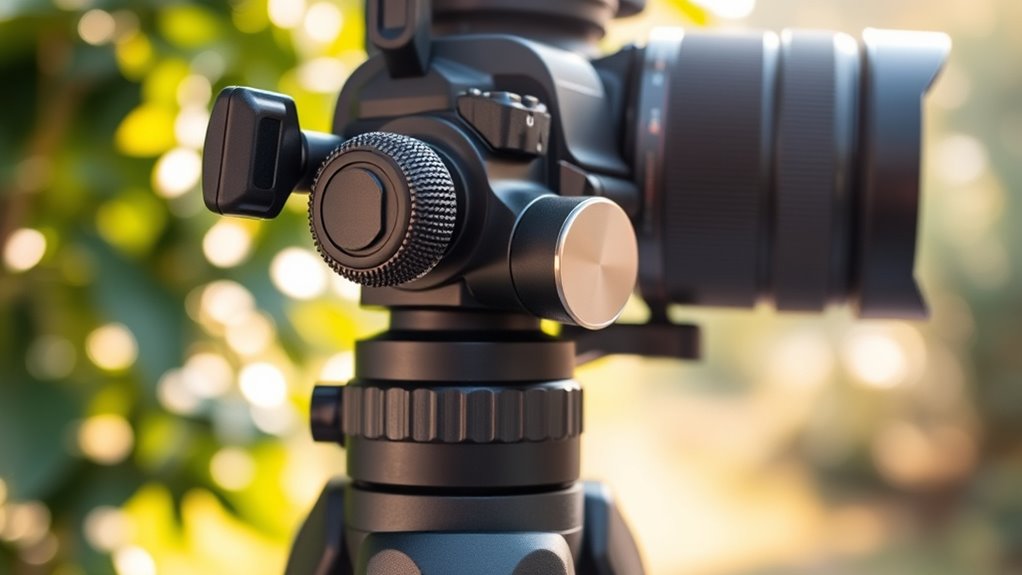
Aligning and Attaching the Quick-Release System

Before securing the quick-release system, confirm that the mounting surface and base plate are precisely aligned. Position the plate so it sits flush against the surface, ensuring the mounting holes line up correctly. Hold the plate steady, then insert the mounting screws or bolts through the holes. Tighten them snugly, but avoid overtightening, which can crack surfaces or strip threads. Use a level if necessary to verify proper horizontal alignment, especially on uneven surfaces. Double-check that the quick-release mechanism moves smoothly and seats properly into its mount. Guarantee there’s no unintended side-to-side or up-and-down play. Precise alignment prevents issues during use and assures a secure fit, so take your time to get it right before moving on to locking or securing the system further. Additionally, understanding the mechanics of quick-release systems can help ensure proper installation and long-term durability.
Ensuring a Tight and Secure Fit

Once you’ve aligned the quick-release plate properly, the next step is to guarantee it fits tightly and won’t shift during use. Tighten all mounting screws or levers securely, but avoid overtightening, which can damage threads or surfaces. Use a torque wrench if available, following manufacturer specifications to ensure proper tension. Check that the plate sits flush against the mounting surface without wobbling or side-to-side play. Some slight vertical movement may be acceptable, but excessive movement indicates a loose fit. If your mount has locking mechanisms or latches, engage them fully to prevent accidental release. Regularly inspect the mount for loosening or wear, especially in demanding environments. A secure fit ensures your gear stays stable and safe during operation.
Testing the Mount for Stability and Ease of Removal

After installing your mount, it’s vital to verify its stability and ease of removal to guarantee safe and reliable use. First, give the mounted device a gentle tug to check for side-to-side and up-and-down movement. It should feel snug without excessive play. Next, remove and reattach the gear multiple times to ensure the quick-release mechanism functions smoothly. Pay attention to any sticking or difficulty in locking or unlocking. If the mount feels loose or hard to operate, tighten screws or adjust the mounting surface as needed. Also, observe the mount in real-world conditions—vibrations, weather, or movement—to confirm it maintains stability over time. This thorough testing guarantees your gear stays secure and easily accessible when needed.
Maintaining and Inspecting Your Mounts for Safety

You should establish a regular inspection schedule to catch any signs of wear or damage early. Keep your mounts clean using proper techniques to prevent dirt and corrosion from jeopardizing their safety. By consistently checking and maintaining your mounts, you ensure they remain secure and reliable during use.
Regular Inspection Schedule
Regularly inspecting your quick-release mounts is essential to guarantee safety and peak performance. You should check for signs of wear, corrosion, or damage at least once a month, especially after exposure to harsh conditions. Tighten any loose bolts or screws using the appropriate tools, like hex keys or screwdrivers. Look for cracks or deformation in mounting surfaces and fasteners. Verify that moving parts, such as levers or locking mechanisms, operate smoothly without excessive play or resistance. Inspect for rust or corrosion, particularly in marine environments, and treat or replace affected parts promptly. Ensure washers and lock nuts remain secure. Maintaining a consistent inspection schedule helps prevent accidents, prolongs your gear’s lifespan, and keeps your setup safe and reliable during use.
Proper Cleaning Techniques
Proper cleaning techniques are essential for ensuring your quick-release mounts remain safe and functional over time. Regularly inspect your mounts for dirt, debris, and corrosion, especially in marine or outdoor environments. Use a soft brush or cloth to wipe away dust and grime, avoiding abrasive materials that could damage surfaces. For stubborn dirt, dampen the cloth with mild soap and water, then dry thoroughly to prevent rust. Apply a small amount of lubricant, like silicone spray, to moving parts to keep them operating smoothly. Check for signs of corrosion or wear, and replace any damaged components immediately. Keep mounting surfaces clean and dry before installing or reattaching gear. Proper maintenance extends the life of your mounts and ensures they remain secure and safe during use.
Frequently Asked Questions
Can I Use Different Brands of Quick-Release Mounts Interchangeably?
Yes, you can use different brands of quick-release mounts interchangeably if they share compatible standards or adapters. Check if the mounting plates, screw sizes, and connection types match or can be adapted with available accessories. Always verify the fit and secure connection before use, especially in demanding environments like marine or outdoor settings. Using compatible mounts guarantees stability and safety while allowing you to mix and match your gear conveniently.
What Is the Maximum Weight Capacity for a Typical Quick-Release Mount?
Most quick-release mounts support between 2 to 15 pounds, depending on their design and intended use. You should always check the manufacturer’s specifications to guarantee it can handle your gear’s weight safely. Avoid exceeding this limit, as it can cause the mount to fail or damage your equipment. If your gear is heavy or requires extra stability, consider a mount with a higher weight capacity or reinforced hardware.
How Do I Prevent Corrosion on Marine Quick-Release Mounting Systems?
To prevent corrosion on marine quick-release mounting systems, you should regularly rinse them with fresh water after saltwater exposure. Apply a corrosion-inhibiting spray or marine-grade lubricant to all metal parts, especially threaded areas. Use stainless steel or other corrosion-resistant hardware when possible. Additionally, tighten all bolts properly and inspect for signs of rust or wear, replacing parts as needed. Keeping your system clean and well-maintained extends its lifespan considerably.
Are There Quick-Release Mounts Suitable for Uneven or Curved Surfaces?
If uneven or curved surfaces seem challenging, don’t worry—you can find quick-release mounts designed with flexibility in mind. Look for mounts with adjustable pivot or ball-and-socket joints that conform to curves and irregularities. These mounts often feature adaptable bases or clamps that grip securely without damaging surfaces. By choosing versatile options, you make certain your gear stays stable and accessible, even on the most unconventional and rugged surfaces.
How Often Should I Inspect and Maintain My Quick-Release Mounting Systems?
You should inspect and maintain your quick-release mounting systems at least once a month, especially if they’re exposed to harsh environments like saltwater or extreme weather. Check for loose bolts, corrosion, or wear on moving parts. Clean and lubricate mechanisms if needed, and tighten any loose screws or nuts. Regular maintenance guarantees your gear stays secure, functions smoothly, and prevents unexpected failures during critical use.
Conclusion
Now that you know how to select, prepare, install, and test your quick-release mounts, you’re ready to customize your gear with confidence. Keep your mounts secure, keep your gear accessible, and keep your safety in mind. Regularly inspect and maintain your mounts to guarantee they stay reliable and safe. With the right tools and a bit of patience, you’ll enjoy quick, easy access and peace of mind every time you use your favorite gear.