To build a simple truck bed awning, gather waterproof tarp, lightweight frame supports like PVC pipes or tent poles, ropes, stakes, and brackets. Plan your frame shape, assemble the supports securely, and attach the tarp tightly to prevent flapping. Mount the frame to your truck using brackets or tracks, then stake out guy lines for extra stability. With these straightforward steps, you’ll have a sturdy shelter—keep exploring for more tips on making it last longer.
Key Takeaways
- Measure your truck bed and select a waterproof tarp large enough to provide full coverage.
- Build a lightweight, sturdy frame using PVC pipes or tent poles shaped as an A-frame or rectangle.
- Securely attach the tarp edges to the frame with ropes or parachord, ensuring proper tension and overlap for waterproofing.
- Mount the frame to your truck bed using weather-resistant brackets or tracks for stability.
- Stake out guy lines and tie down edges to ground anchors for added support and wind resistance.
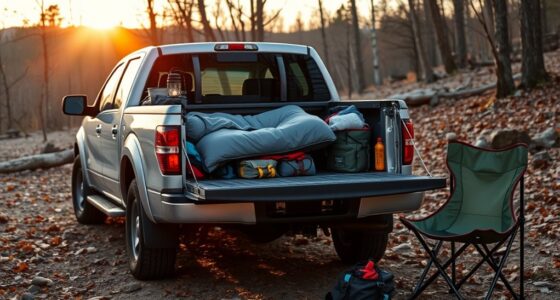
waterproof tarp for truck bed awning
As an affiliate, we earn on qualifying purchases.
As an affiliate, we earn on qualifying purchases.
Gathering Materials and Planning Your Design

Before building your truck bed awning, you need to gather the right materials and plan your design carefully. First, choose a suitable tarp, typically around 9’x11′ or 9’x12′, that’s waterproof and has UV protection. Next, decide on your frame support—collapsible tent poles or PVC pipes work well because they’re lightweight and easy to handle. Gather ropes or parachord to secure the tarp and tent stakes to anchor everything firmly to the ground. Consider how you want to attach the awning—directly to your truck bed rails or with tracks for easy removal. Measure your truck bed and plan your frame’s dimensions to ensure full coverage and stability. Proper planning guarantees your awning is effective and durable in various weather conditions. Additionally, understanding projector technology can help you choose the best setup for outdoor movie nights under your awning.
lightweight PVC pipe tent support
As an affiliate, we earn on qualifying purchases.
As an affiliate, we earn on qualifying purchases.
Constructing the Frame for Your Awning

Start by choosing durable materials like PVC pipes or tent poles that fit your budget and needs. Next, decide on a frame shape, such as an A-frame or rectangle, that provides sturdy support and easy setup. Finally, assemble the components carefully, using connectors like T-joints or elbows to create a stable and weather-resistant frame. Incorporating energy-efficient materials can also enhance the durability and sustainability of your awning.
Selecting Frame Materials
Choosing the right materials for your frame is essential to guarantee your awning is sturdy and weather-resistant. You want materials that are lightweight yet strong enough to withstand wind and rain. PVC pipes are a popular choice because they’re affordable, easy to cut, and resistant to rust. Collapsible tent poles make setup quick and convenient, especially if you already own a tent. If you prefer a more durable option, metal tent stakes or lightweight aluminum pipes work well. Avoid heavy or fragile materials that can bend or break easily. Make sure your frame components are compatible and connect securely with T-connectors or elbow joints. Selecting weather-resistant, corrosion-proof materials ensures your awning stays stable and reliable during your camping trips. Incorporating nanotechnology advancements can further enhance the durability and weatherproofing of your materials.
Designing Frame Shape
Designing your frame shape is a crucial step to guarantee your awning provides adequate coverage and stability. First, decide whether an A-frame or rectangular shape best fits your needs. An A-frame offers a sleek, angled design that sheds water easily, while a rectangular shape provides more interior space. Measure your truck bed and tarp to ensure the frame matches for full coverage. Keep in mind the height and width, making sure the structure is tall enough to provide headroom and wide enough to protect against wind and rain. Use T-connectors or elbow joints to connect the frame pieces securely. Focus on creating a sturdy, balanced shape that can withstand weather conditions without compromising portability or ease of setup.
Assembling Frame Components
To assemble the frame components, begin by cutting your PVC pipes or tent poles to the desired lengths based on your chosen shape—either A-frame or rectangular. Measure carefully to ensure the pieces fit your tarp and provide enough coverage. Connect the frame using T-connectors or elbow joints, securing each joint tightly. For an A-frame, two side supports meet at the top, while a rectangular frame uses four corner pieces. Make sure the frame height and width match your tarp dimensions for full coverage. Double-check all connections for stability. Reinforce joints if needed with duct tape or zip ties. The goal is a sturdy, lightweight structure that can withstand weather conditions and support the tarp securely. Proper assembly techniques help ensure your awning remains durable during outdoor use.
truck bed awning brackets and tracks
As an affiliate, we earn on qualifying purchases.
As an affiliate, we earn on qualifying purchases.
Attaching the Tarp to the Frame

You’ll want to secure the tarp edges tightly using rope or parachord, making sure they stay in place during wind. Clamps or double-sided tape can also help attach the tarp to the frame for extra stability. Overlap the edges of the tarp to improve weatherproofing and prevent water from seeping underneath. Additionally, ensuring proper tension and secure fastenings can help maintain stability during gusts, similar to the importance of effective navigation and mapping in robotic systems.
Securing Edges With Rope
Securing the tarp edges with rope is a simple yet effective way to keep your awning stable and weather-resistant. Begin by draping the tarp over your frame, ensuring it covers the area completely. Tie the rope tightly around the edges of the tarp, pulling it snugly to prevent flapping in the wind. Wrap the rope around tent stakes or anchor points at each corner, then secure with a sturdy knot like a bowline or trucker’s hitch. For added stability, run the rope along the sides and tie to stakes or nearby anchor points. Check that the tarp is taut but not overly tight, to avoid tearing. Properly securing the edges keeps your awning in place and provides reliable shelter during your campsite stay. Additionally, using proper tension ensures the tarp remains durable and resistant to weather conditions.
Attaching With Clamps or Tape
Attaching the tarp to the frame with clamps or tape provides a quick and secure method to hold the cover in place. Clamps grip the edges of the tarp tightly onto the frame, preventing flapping and shifting. Tape, especially double-sided or marine-grade, creates a strong bond between the tarp and the support structure. To visualize this:
- You position the tarp over the frame, ensuring even coverage.
- Use clamps to clip along the edges, tightening them until the tarp is snug.
- Alternatively, apply strips of tape along the edges where the tarp contacts the frame for a weatherproof seal.
Both methods are fast, adjustable, and don’t require complicated tools. They keep your tarp secure during windy conditions and make setup or takedown simple. Weatherproofing is an important aspect to consider when attaching tarps for outdoor use.
Overlapping for Weatherproofing
To guarantee your awning stays dry and protected from the elements, overlapping the tarp edges is essential for weatherproofing. When draping the tarp over your frame, ensure each side extends beyond the support structure. This overlap allows water to runoff rather than pool on the tarp, preventing leaks. Secure the edges tightly with ropes or clamps, pulling the overlaps taut to eliminate slack that could catch wind. Use stakes along the edges to keep the tarp grounded and prevent flapping. If possible, angle the tarp slightly downward on the edges, encouraging water to flow off. Proper overlapping creates a layered barrier that keeps rain and wind from penetrating, maintaining a dry, sheltered space beneath your awning. Additionally, understanding the science behind waterproofing can help you optimize your setup for better durability and protection.
camping guy line stakes and anchors
As an affiliate, we earn on qualifying purchases.
As an affiliate, we earn on qualifying purchases.
Mounting the Awning to Your Truck Bed or Cap
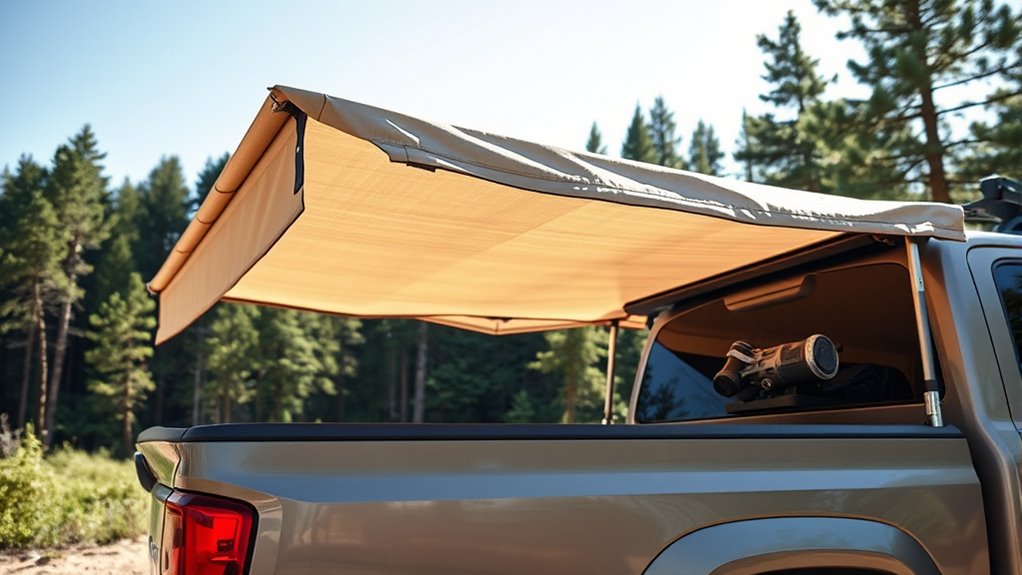
Mounting your awning directly to the truck bed or cap offers a sturdy and convenient setup. To do this effectively, you’ll need a few key components. First, install weather-resistant brackets or tracks along the bed rails or cap edges for secure attachment. Second, use mounting hardware like bolts, screws, or clamps designed for outdoor use to fasten the awning frame or tarp support brackets. Third, guarantee the mounting points are evenly spaced to maintain stability and prevent sagging. Position the brackets or tracks so the awning provides ideal shade and weather protection. Double-check all connections for tightness before setting up your tarp, as a secure mount ensures your awning withstands wind and rain during your campsite stay. Proper installation techniques are essential to ensure the durability and safety of your setup.
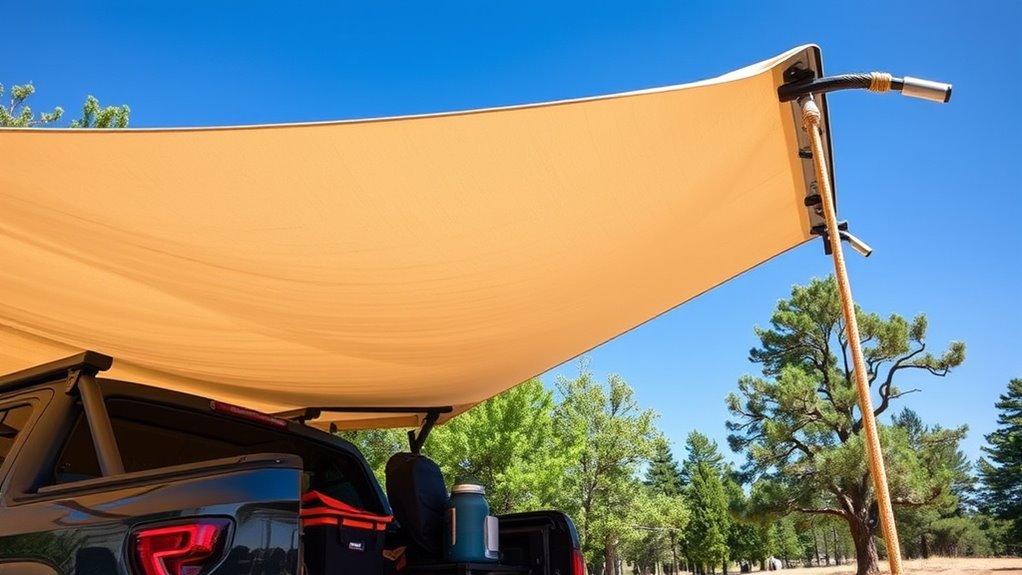
Setting Up and Securing Your Awning at the Campsite

Setting up and securing your awning at the campsite is a straightforward process that guarantees stability and protection from the elements. First, position your awning so it provides ideal shade and covers the desired area. Secure the tarp edges with tent stakes, driving them into the ground at an angle for better hold. Use ropes or parachord to tie down the corners and sides, ensuring the tarp stays taut. Attach the frame securely to your truck bed or cap, using clamps or brackets if installed. For added stability, especially in windy conditions, consider staking out guy lines from the frame or tarp corners. Double-check all connections, stakes, and ties to make sure your awning remains steady, giving you confidence to relax and enjoy your campsite. To maximize your setup, familiarize yourself with smartphone and accessory tips to troubleshoot any unexpected issues quickly.
Tips for Maintaining and Enhancing Your Awning Setup
Regular maintenance keeps your awning looking good and working effectively over time. To ensure longevity, regularly inspect your setup for wear and tear.
- Check the tarp for rips or fading, and replace it if necessary to maintain waterproofing and UV protection.
- Tighten or replace ropes and stakes after strong winds, and consider adding guy lines for extra stability.
- Clean the frame and hardware with mild soap and water to prevent rust and corrosion, especially after exposure to rain or dirt.
Enhance your setup by upgrading to heavier-duty stakes or stronger ropes for windy conditions. Consider adding a weather-resistant canopy or side panels for full shelter. Practicing quick setup and takedown keeps you prepared and extends your awning’s lifespan.
Frequently Asked Questions
How Do I Choose the Best Tarp Material for Durability?
You should look for a tarp made from heavy-duty, waterproof, and UV-resistant material like polyethylene or vinyl. These fabrics withstand harsh weather, resist tearing, and last longer. Check for reinforced edges and grommets to prevent ripping when securing the tarp. Consider a tarp with a reflective or coated surface for added UV protection. Prioritize durability over price to ensure your awning holds up during tough outdoor conditions.
Can I Build an Awning Without Any Tools?
Yes, you can build an awning without tools. Use a sturdy tarp, lightweight poles or even branches, and strong ropes or parachord. Secure the tarp by tying it to your truck, nearby trees, or existing structures. Wrap ropes around poles or branches to create a frame, then stake down the edges of the tarp. This simple setup provides shade and shelter quickly, without needing any tools.
What Are the Best Ways to Prevent the Tarp From Flapping?
You can prevent the tarp from flapping by securing all edges tightly with tent stakes and ropes. Overlap the tarp edges to improve water runoff and add weight. Use clamps or ropes to hold the tarp firmly on the frame, and consider adding guy lines for extra stability in windy conditions. Regularly check and tighten attachments during your setup to keep the tarp snug and prevent flapping.
How Do I Store the Awning for Long-Term Camping Trips?
Imagine your awning neatly folded, ready to be tucked away after a long trip. You should disassemble the frame, carefully roll the tarp to prevent creases, and secure it with ties or straps. Store everything in a dry, cool place like your truck bed or a dedicated storage bin. Regularly inspect for damage, and guarantee it stays clean and dry so it’s ready for your next adventure.
Are There Any Safety Tips for Setting up in Windy Conditions?
When setting up your awning in windy conditions, you should always secure it firmly. Use extra guy lines and stakes to stabilize the frame and prevent it from collapsing or blowing away. Position the awning to minimize wind catch, ideally with the open side away from prevailing breezes. Check all knots and fastenings, and avoid setup on loose or unstable ground. Regularly monitor and adjust your setup as wind conditions change.
Conclusion
With a simple DIY awning, you can create a comfortable, shaded spot at your campsite, making outdoor adventures more enjoyable. While some believe that homemade gear isn’t as durable as store-bought, recent tests suggest that with quality materials and proper setup, DIY awnings can withstand the elements just as well. So, don’t hesitate to customize your setup—you might find that your own design offers both great value and reliable shelter for many trips to come.