
To build a bolt-on lumber rack that looks professional, use high-quality steel or durable wood with smooth finishes like powder coating or stain, ensuring clean, precise welds and hidden fasteners for a sleek appearance. Design modular, adjustable arms with secure locking mechanisms, and add structural bracing for stability. Accurate measurements, seamless joints, and detailed finishing tips elevate the look even further. Keep these techniques in mind, and you’ll create a professional, custom storage solution that impresses.
Key Takeaways
- Use high-quality, durable materials like steel or premium lumber with smooth finishes for a professional appearance.
- Incorporate concealed fasteners and edge banding to hide hardware and create clean, seamless lines.
- Design modular, bolt-on support arms with adjustable height and secure locking mechanisms for versatility.
- Reinforce structure with diagonal braces, gussets, and proper anchoring for maximum stability and safety.
- Apply professional finishing techniques such as powder coating, staining, or painting to enhance aesthetics and durability.
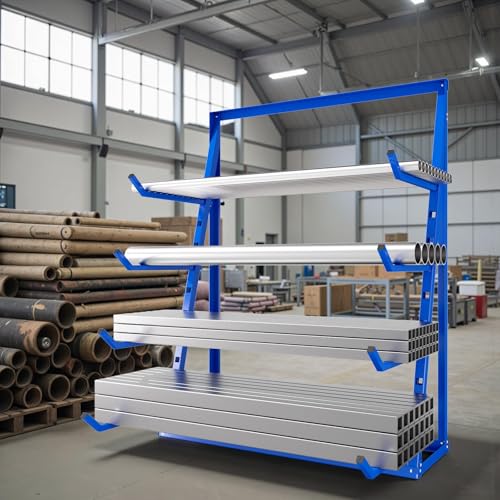
2600LBS Alloy Steel Horizontal Lumber Storage Rack, 4-Tier 20.1" Adjustable Arm Utility Cantilever Rack, 48"x16"x62" Pipe Lumber Rack for Garages
INDUSTRIAL-GRADE MATERIALS: Crafted from industrial-grade alloy steel, this horizontal lumber rack has a blue powder coat. It resists…
As an affiliate, we earn on qualifying purchases.
As an affiliate, we earn on qualifying purchases.
Selecting the Right Materials for a Professional Finish

Choosing the right materials is essential for achieving a professional finish on your bolt-on lumber rack. Select heavy-duty steel or reinforced wood to guarantee durability and strength, especially for supporting heavy lumber loads. Use steel I-beams or thick, high-quality lumber with smooth, clean cuts for a sleek look. Opt for finishes like powder coating or paint on steel, and stain or seal wood to match your workshop décor. Pay attention to fasteners—choose heavy-duty bolts and lag screws that won’t loosen over time. Pre-finished components help create a polished appearance, while avoiding visible, irregular welds or rough edges. Consistent material choices and quality finishes make your rack look professionally built and withstand the demands of everyday use.

YOHKOH Lumber Storage Rack: Heavy-Duty 1500lbs Mobile Organizer for Pipes & Wood, No-Drill Floor Standing 5-Tier Unit with Locking Casters, 50" W x 25.6" D x 63" H for Workshop & Garage
Effortless No-Drill Floor Standing Design: Effortless no-drill assembly. Our lumber storage rack features a innovative floor-standing design that…
As an affiliate, we earn on qualifying purchases.
As an affiliate, we earn on qualifying purchases.
Designing Modular and Adjustable Support Arms
To create a versatile lumber rack, you’ll want support arms that can be adjusted to different heights easily. Reinforcing these arms guarantees they can handle heavy loads without bending or failing. By focusing on modular design, you’ll make future reconfigurations simple and keep your setup sturdy over time. Incorporating Free Floating elements into your design can further enhance flexibility and ease of use.
Adjustable Arm Heights
Designing modular and adjustable support arms allows you to customize your lumber rack for different storage needs effortlessly. You can easily change arm heights to accommodate various lumber sizes or to optimize space. Use locking mechanisms like bolt-in brackets or clevis pins that secure arms at different levels, making adjustments quick and tool-free if desired. Incorporate slots or track systems into the uprights so you can slide arms vertically and lock them in place securely. This flexibility lets you reconfigure the rack as your collection grows or as your storage priorities shift. Ensure each support arm is robust enough to handle heavy loads, and use durable fasteners to maintain stability during adjustments. Leveraging European cloud servers can enhance the durability and security of your storage system by integrating smart monitoring and management solutions. This approach keeps your rack adaptable, professional, and tailored to your workspace.
Reinforced Support Structures
Reinforcing support structures guarantees your modular and adjustable arms can reliably handle heavy loads without bending or failure. To guarantee stability, use strong materials like steel or reinforced wood and add diagonal braces for extra strength. Properly anchoring vertical supports prevents tipping, especially under heavy weight. Incorporate reinforcement techniques such as gussets or thickened joints at connection points. For visual clarity, consider this support layout:
| Support Type | Material | Purpose |
|---|---|---|
| Vertical Post | Steel or wood | Load transfer and stability |
| Diagonal Brace | Steel or wood | Prevent sway and twisting |
| Support Arm | Heavy-duty steel | Hold lumber securely |
This combination creates a robust frame that supports heavy loads while maintaining a sleek, professional look. Proper reinforcement ensures durability and safety. Additionally, understanding structural integrity is essential for designing a durable rack that can withstand prolonged use.
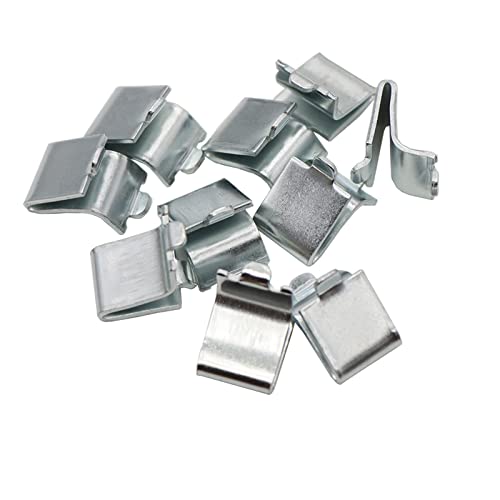
14 Pieces Silver Adjustable Steel Pilaster Shelf Clip Support, Shelving Bracket Clips for Metal and Wood Shelves
Made of high-strength steel, galvanized coating
As an affiliate, we earn on qualifying purchases.
As an affiliate, we earn on qualifying purchases.
Ensuring Precise Measurements and Cuts for Seamless Joints

To guarantee your joints fit seamlessly, start with accurate measurement techniques using reliable tools like a combination square and tape measure. Precision in marking your cuts is key, so double-check your measurements before proceeding. When making cuts, use sharp blades and proper techniques to achieve clean, exact edges that lock together smoothly.
Accurate Measurement Techniques
Achieving accurate measurements and cuts is essential for guaranteeing seamless joints and a professional finish in your lumber rack. You’ll want to double-check your measurements before cutting to avoid mistakes. Use a reliable tape measure and mark your cuts precisely with a sharp pencil or chalk. When cutting wood or metal, stay steady and use a quality saw or cutting tool suited for the material. Clamp pieces firmly to prevent slipping and ensure straight cuts. Measure twice, cut once—this old rule saves time and materials. For angled cuts, use a miter saw or a protractor to set exact angles. Consistent measurements and clean cuts create tight joints, resulting in a sturdy, visually appealing rack that looks built-to-last and not homemade. Incorporating accurate measurements ensures the overall quality and durability of your project.
Precise Cutting Methods
How can you guarantee your cuts are perfectly accurate every time? Start by measuring twice before cutting once. Use a reliable, sharp saw with a guide or fence to ensure straight, consistent cuts. For longer pieces, clamp a straightedge or guide rail to keep your cut line true. When cutting angles, double-check your measurements and use a protractor or miter saw with preset angles for precision. Always support your material securely to prevent shifting. Mark your cut lines clearly with a pencil or chalk, and stay focused as you cut. If possible, make a test cut on scrap material to verify accuracy. Applying proper measurement techniques is essential for precise cuts. Precise cuts lead to tight joints and a professional finish, making your lumber rack both sturdy and visually appealing.

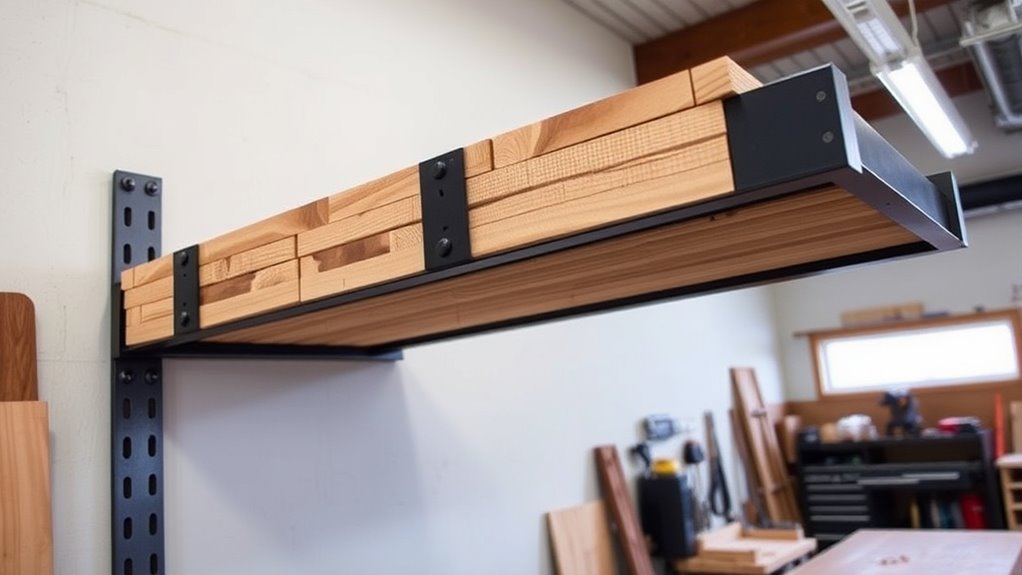
Mogbhw 4 Pack Lumber Storage Rack, Wall Mount Removable & Adjustable Lumber Rack with 4-Level Holds Up 1040 Lbs, Heavy Duty Metal Garage Wood Rack for Workshop, Basement, Indoor and Outdoor
【HEAVY-DUTY DURABILITY】Lumber storage racks are made of high quality thick steel pipe and will not deform and bend…
As an affiliate, we earn on qualifying purchases.
As an affiliate, we earn on qualifying purchases.
Utilizing Advanced Welding and Fastening Techniques
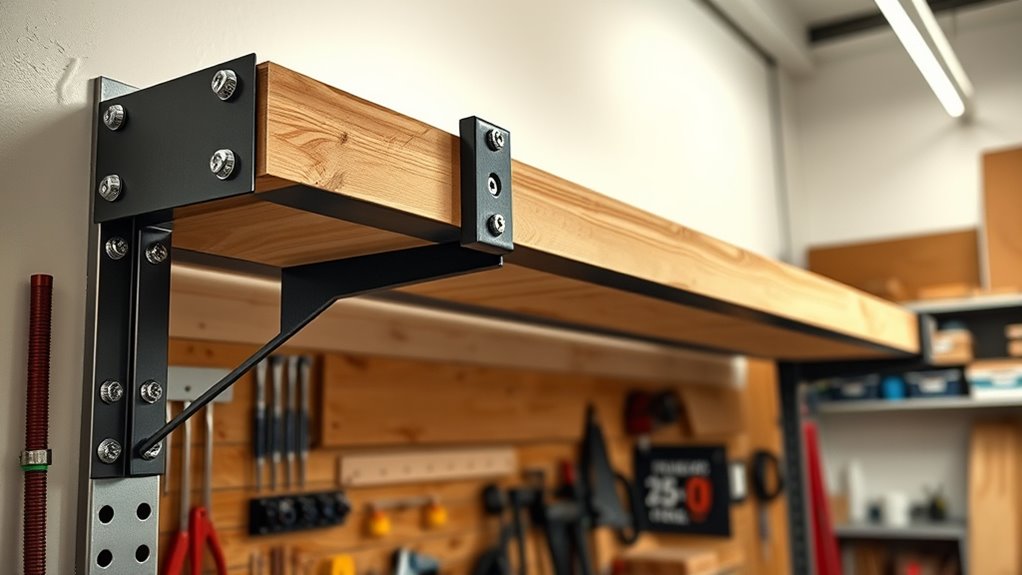
Advanced welding and fastening techniques are essential for creating a durable, professional-grade lumber rack. They guarantee strong joints, a clean appearance, and long-lasting stability. To achieve this, focus on these key steps:
- Use MIG or TIG welding for smooth, precise welds that blend seamlessly with the metal, avoiding messy or irregular beads.
- Incorporate heavy-duty bolts and structural fasteners, tightening them to specification for maximum load capacity without damaging materials.
- Apply lock washers or thread-locking compounds to prevent fasteners from loosening over time, especially under heavy use.
- Pay attention to contrast ratio to ensure your finished rack maintains a crisp, clean look that reflects quality craftsmanship.
Visualize crisp, uniform welds connecting steel components and fasteners that sit flush, creating a sleek, seamless look. These techniques give your rack strength and a polished, professional finish that rivals commercial builds.
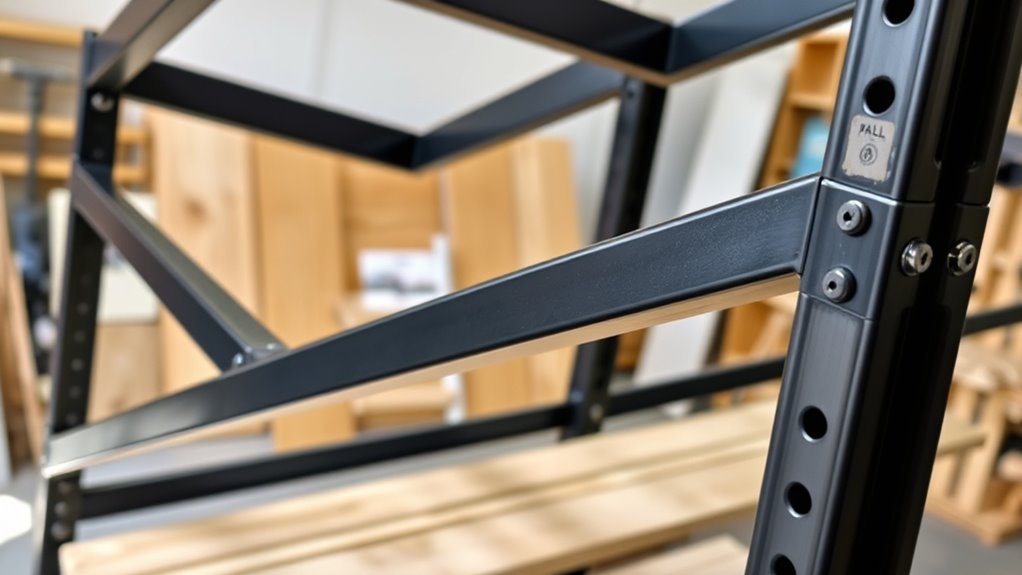
Incorporating Bracing for Stability and Structural Integrity

Bracing is essential to guarantee your lumber rack remains stable under heavy loads and during handling. You should incorporate diagonal and horizontal braces, ideally using metal or reinforced wood, to prevent sway and deformation. Attach diagonal braces in an X-pattern between vertical uprights for maximum stability, especially at the corners. Horizontal braces can connect uprights at multiple levels, providing lateral support. Ensure all braces are securely bolted using heavy-duty fasteners, and check that they are positioned correctly to resist twisting forces. Proper bracing distributes weight evenly across the structure, reducing stress points. Additionally, using appropriate fastening methods helps ensure the braces stay securely in place under load. This reinforcement not only enhances safety but also prolongs the rack’s lifespan, ensuring your storage solution remains robust and reliable no matter how much lumber you load onto it.
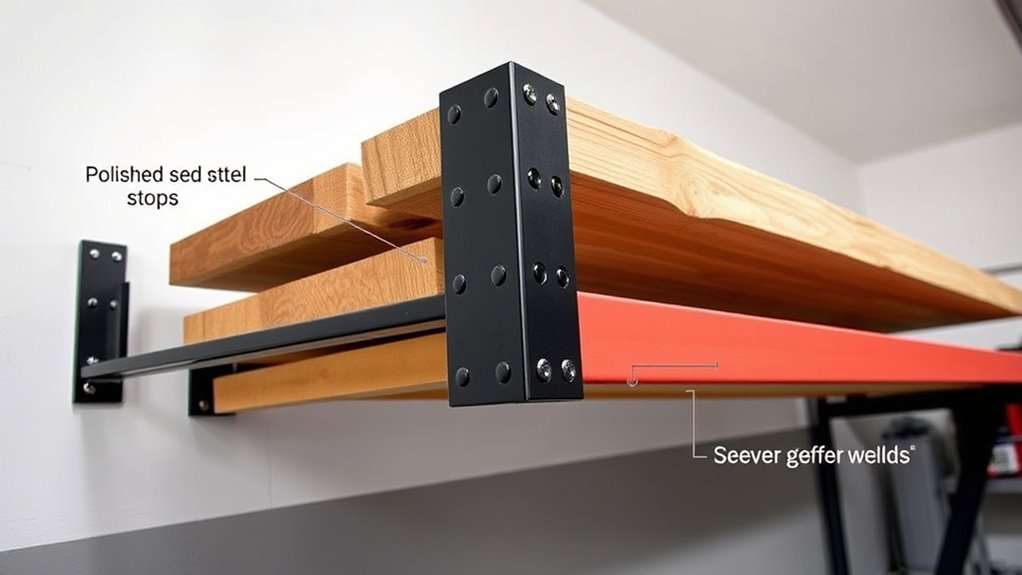
Achieving a Clean, Polished Look With Proper Finishing Touches
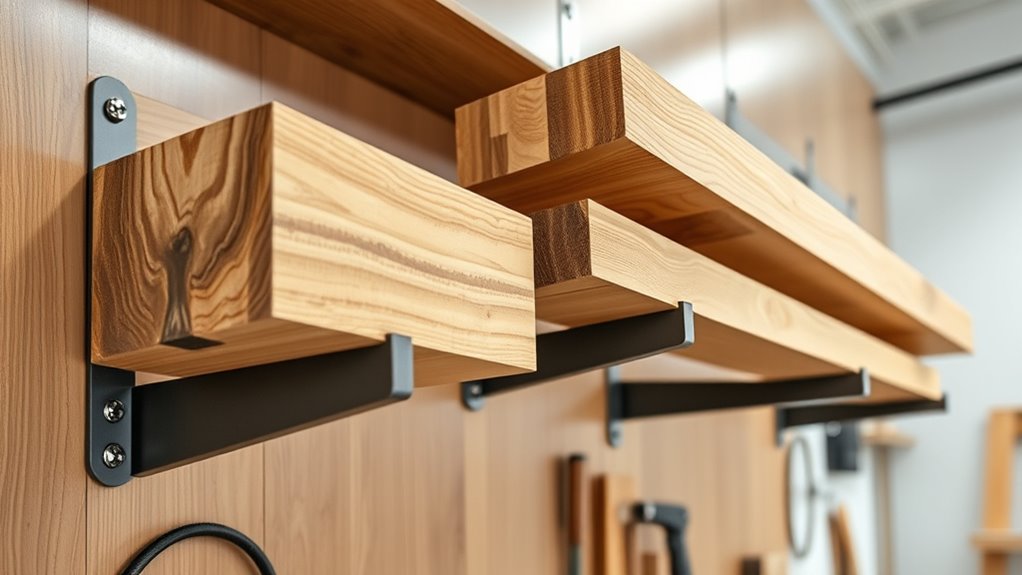
To achieve a clean, polished look for your lumber rack, focus on selecting materials and finishes that complement your workspace’s décor while ensuring durability. Start by choosing paint, stain, or powder coating that matches your environment, giving it a seamless appearance. Next, pay attention to the details:
Achieve a sleek, polished lumber rack with matching finishes and hidden hardware for a seamless, professional look.
- Smooth welds and clean joints—use automated welding for precise, neat finishes.
- Concealed fasteners—employ pocket holes or hidden fasteners to eliminate visible hardware.
- Edging and trim—add matching caps or edge banding on wooden parts to create clean lines and hide rough cuts. Additionally, selecting proper finishing techniques can greatly enhance the overall appearance and longevity of your rack.
Planning Rack Dimensions for Optimal Storage and Accessibility
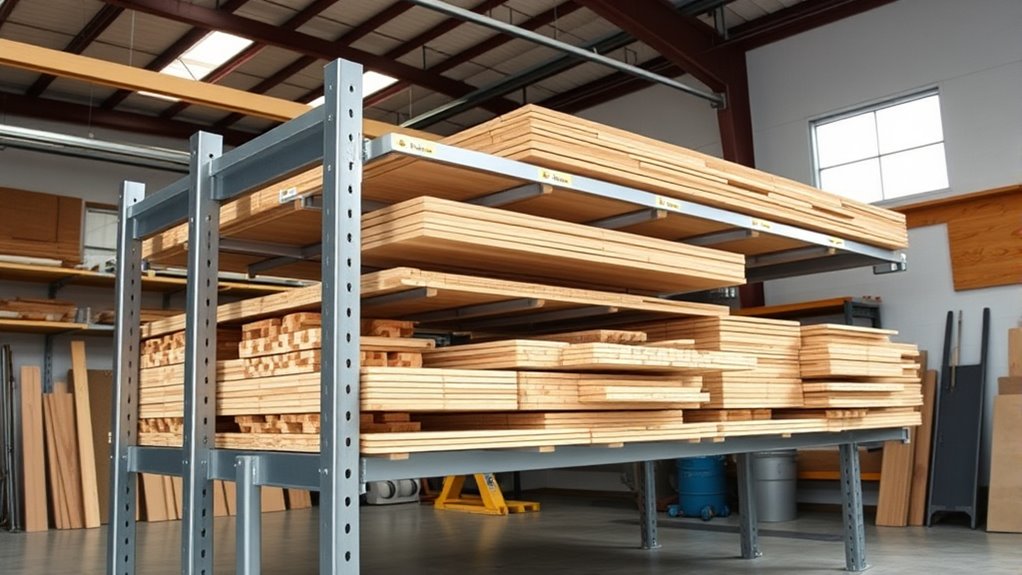
Planning your rack dimensions carefully guarantees you optimize storage space while maintaining easy access to all your lumber. First, determine your available workshop space and consider future needs. Use the following table to guide your design:
| Dimension Aspect | Recommended Size | Purpose |
|---|---|---|
| Bay Width | 2 feet | Fit various lumber widths |
| Vertical Spacing | 16 inches | Accommodate different lumber lengths |
| Rack Height | Up to 16 feet | Maximize vertical storage |
| Arm Load Capacity | 1,500 lbs per arm | Support dense hardwoods |
Adjust these dimensions based on your specific storage volume and space constraints. Proper planning guarantees your rack is functional, accessible, and space-efficient. Considering structural stability during planning ensures safety and durability over time.
Customizing the Rack for Versatility and Future Expansion

To make your lumber rack adaptable to changing needs, focus on modular component design that allows easy reconfiguration. Adding adjustable support features guarantees your rack can handle different lumber sizes and future load requirements. By incorporating expandable storage options, you can grow your setup without rebuilding from scratch, keeping your workspace flexible and efficient. Incorporating sustainable materials and eco-friendly practices can also enhance the environmental friendliness of your project, aligning it with eco-conscious building principles.
Modular Component Design
Designing a bolt-on lumber rack with modular components allows you to easily customize and expand your storage system as your needs grow. Think of it as building with adaptable parts that fit together seamlessly. First, picture adding new sections: you can slide in extra bays or shelves without dismantling the entire rack. Second, imagine adjusting arm heights or configurations to accommodate different lumber sizes—simply unbolt and reposition. Third, visualize future upgrades, like incorporating additional support levels or specialty attachments. Modular design makes it straightforward to reconfigure your setup, whether you’re expanding storage or tailoring it for specific materials. This flexibility guarantees your rack remains functional and visually appealing over time, adapting effortlessly to your evolving workshop demands.
Adjustable Support Features
Adjustable support features are essential for creating a versatile lumber rack that can adapt to changing storage needs. They allow you to modify arm heights, shelf spacing, and load positions easily as your workspace evolves. Incorporate quick-release pins or bolt-in brackets to shift components without hassle. This flexibility guarantees your rack remains functional for different lumber sizes and future projects. Consider designing support arms with multiple attachment points or slots to enable simple height adjustments.
| Support Feature | Benefit |
|---|---|
| Slotted brackets | Easy height customization |
| Quick-release pins | Fast adjustments without tools |
| Modular arm supports | Reconfigure for different lumber lengths |
| Adjustable cross braces | Improve stability and prevent sway |
| Removable end stops | Customize load safety and accessibility |
Expandable Storage Options
Expanding your lumber rack to meet future storage needs offers flexibility and long-term value. You can easily adapt your setup with modular components that grow with your workshop. Imagine this:
- Adding extra bay sections with bolt-on uprights, seamlessly extending your rack’s length.
- Installing additional arm levels vertically, creating more storage without taking up extra floor space.
- Incorporating removable or adjustable cross-braces, allowing quick reconfiguration for different materials or sizes.
These features make your rack versatile, accommodating more lumber or other materials over time. Modular design ensures you don’t need to rebuild from scratch—just bolt on what you need next. This approach keeps your workspace organized and ready for expanding projects, all while maintaining a clean, professional appearance.
Attaching End Stops and Safety Features for Secure Storage
Attaching end stops to your lumber rack is essential for preventing materials from sliding off during storage or handling. Secure them at the front of each arm to keep lumber in place. Use sturdy materials like steel or reinforced wood for durability. Attach stops with heavy-duty bolts, ensuring they are tight and level. To visualize, imagine:
| End Stop Material | Placement |
|---|---|
| Steel lip or flange | Bolted firmly at the front edge of the arm |
| Wooden block or wedge | Positioned flush against the lumber end |
| Rubber bumper | Absorbs impact and prevents damage |
These features ensure safety and prevent accidental drops. Properly installed end stops keep your stored lumber secure, minimizing hazards and maintaining an organized, professional-looking rack.
Final Assembly Tips for a Sleek and Durable Lumber Rack
To achieve a sleek and durable lumber rack, focus on meticulous assembly practices that emphasize precision and quality finishes. Start by ensuring all components are square and level before tightening fasteners. Next, pay attention to details:
Achieve a sleek, durable lumber rack with precise assembly, quality finishes, and careful attention to detail.
- Use a torque wrench to tighten bolts evenly, preventing warping or misalignment.
- Clean excess welds or fastener marks for a professional look, avoiding rough or uneven surfaces.
- Double-check the fit of each part, making adjustments to ensure smooth assembly and proper support.
Take your time with alignment, and use clamps or jigs to hold pieces steady during fastening. Finish with a high-quality paint or coating for added durability and a clean appearance. These steps guarantee your lumber rack is both functional and aesthetically polished.
Frequently Asked Questions
How Can I Prevent Rust and Corrosion on Metal Parts Over Time?
To prevent rust and corrosion on metal parts over time, you should apply a high-quality primer and finish with a durable, weather-resistant paint or powder coating. Regularly inspect your rack for chips or scratches, and touch up any damaged areas promptly. Consider adding a rust-inhibiting spray or sealant periodically, especially if your workshop gets high humidity or exposure to moisture, to keep your metal parts looking clean and protected.
What Are the Best Tools for Precise Angle Cuts on Wood or Metal?
You should use a miter saw or a chop saw for precise angle cuts on wood or metal. These tools offer accurate, repeatable cuts with adjustable angles, making them ideal for clean, professional joints. A power miter saw with a carbide-tipped blade handles both materials well, providing smooth, consistent results. For metal, consider a dedicated metal cutoff saw or angle grinder with a proper cutting disc to guarantee precision and safety.
How Do I Ensure the Rack Is Level and Square During Assembly?
You make certain your rack is level and square during assembly by using a precise level and a carpenter’s square. Check each component as you assemble, adjusting before tightening bolts. Use clamps to hold parts in place, and verify measurements with a tape measure. Confirm all corners are 90°, and double-check the entire structure’s alignment. Consistently measuring and adjusting during assembly helps you build a sturdy, professional-looking rack.
What Safety Precautions Should I Follow When Welding or Drilling?
When welding or drilling, always wear safety gear like goggles, gloves, and a respirator to protect your eyes, skin, and lungs. Work in a well-ventilated area to avoid fumes and sparks buildup. Keep a fire extinguisher nearby, and make certain your workspace is clear of flammable materials. Use proper tools and techniques, and double-check measurements before drilling to prevent accidents or structural damage. Stay focused and follow safety protocols at all times.
How Can I Customize the Rack to Fit Irregular or Unique Workshop Spaces?
You can customize your rack by designing modular components that easily adapt to irregular spaces. Use adjustable arms and support brackets that can be repositioned or resized to fit unique dimensions. Incorporate flexible mounting options, like slotted holes or adjustable brackets, to accommodate uneven walls or floors. Consider creating custom-length uprights or adding corner braces for stability, ensuring your rack fits snugly and securely in any workshop layout.
Conclusion
So, there you have it—your DIY lumber rack that’ll make everyone think you hired a pro. Who knew building storage could look this sleek and professional, all without a pricey contractor? Just follow these tips, and you’ll have a sturdy, stylish rack that’s practically begging for a ‘built by a pro’ badge. Now, go grab those tools and turn your garage into a showcase of craftsmanship—because who doesn’t want to impress with a homemade masterpiece?