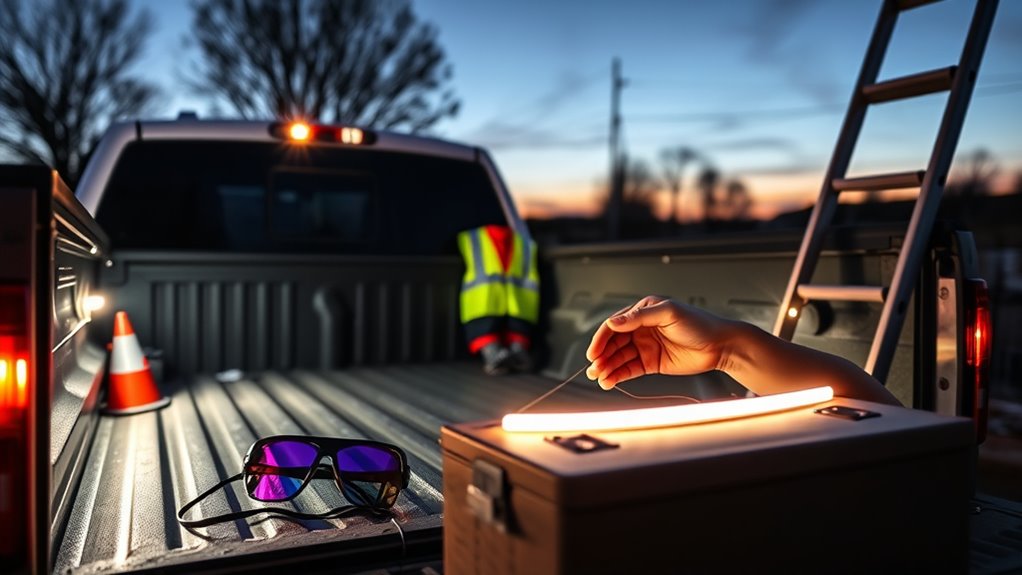
To add cheap LED lighting to your truck bed, get a 60″ LED strip kit, electrical wire, and a relay module. Install the strips along the side rails and secure wiring above the fender liner for a clean look. Connect power from the battery and use a T-tap connector for trigger signals from the dome light. For a seamless setup, guarantee all connections are tight and insulated. Discover tips and tricks for ideal results ahead.
Key Takeaways
- Choose an affordable LED strip light kit, like the Nilight TR-05, which offers ample coverage at a low price.
- Install LED strips along the truck bed’s side rails and front section for optimal illumination.
- Connect wiring through the truck’s existing dome light circuit for easy activation with a relay module.
- Use adhesive backing for quick installation and secure wiring with zip ties for a neat appearance.
- Regularly check connections and components to ensure proper functionality and prevent issues.

Nilight – TR-05 2PCS 60 Inch 180 LEDs Bed Strip Kit with Waterproof on/Off Switch Blade Fuse 2-Way Splitter Extension Cable for Cargo, Pickup Truck, SUV, RV, Boat , 2 Years Warranty
Impressive brightness: The 2PCS light strip includes 180 PCS 5050-SMD LED chips, outputs a 2400LLM 6000K super bright…
As an affiliate, we earn on qualifying purchases.
As an affiliate, we earn on qualifying purchases.
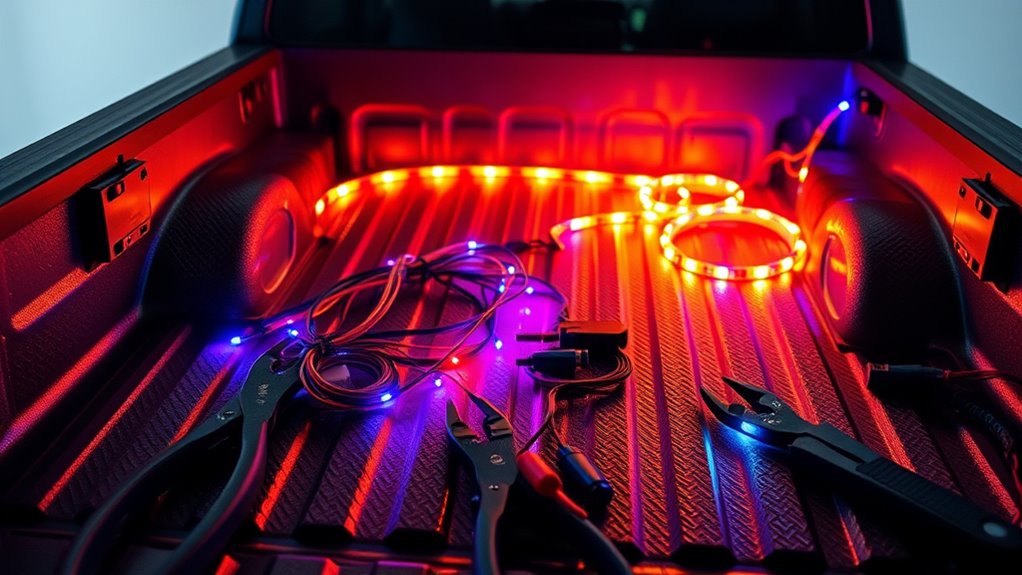
Materials and Tools Required
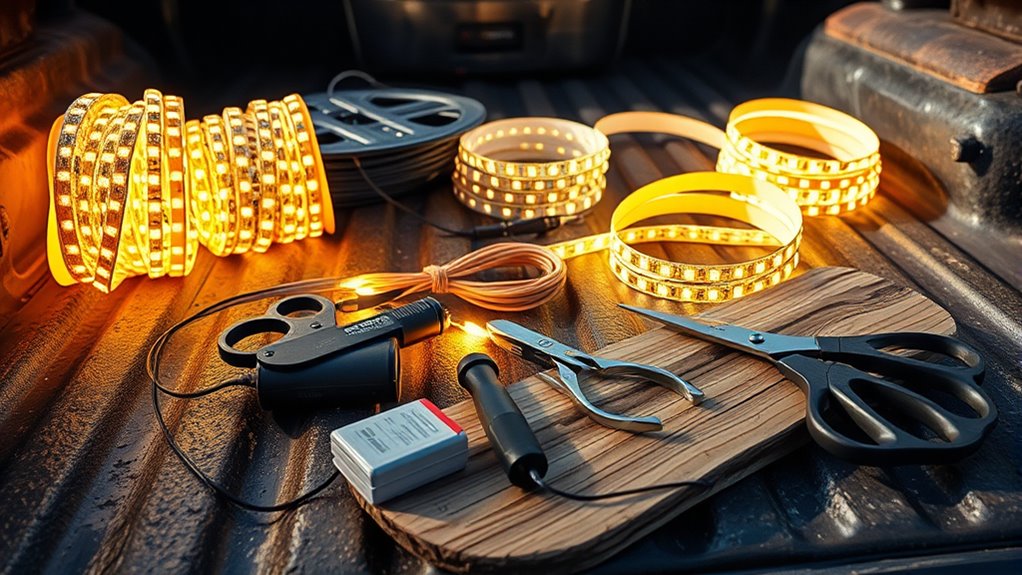
Before you start adding LED lighting to your truck bed, gather the necessary materials and tools to make certain a smooth installation process. You’ll need LED strip lights, ideally a 60″ kit with 180+ LEDs for under $30. Grab some 16-gauge red and black electrical wire, a relay module, and a fuse holder with the right amperage fuses. Don’t forget heat shrink tubing or electrical tape for securing connections, and butt connectors or solder for joining wires. A push button switch or magnetic switch is essential for tailgate activation, along with zip ties to manage the wiring. Additionally, consider the lighting control for optimal visibility when using your truck at night, as proper home décor inspiration can enhance the overall ambiance of your vehicle’s interior. Proper landscaping enhancements can also improve your truck’s appearance while parked in your backyard. Furthermore, having professional equipment ensures that your lighting installation will be both effective and durable. Finally, a screwdriver or trim removal tool will help you access those bed fixtures you’ll need to get to. Remember, ensuring a reliable water purification system will be crucial if you plan to use your truck for outdoor adventures, as access to clean water is vital for survival.

Truck Bed LED Lights Trunk Lighting Kit, Compatible with Newer Toyota Tacoma 2020 2021 2022 2023, OEM Replaces# PT857-35200 84267-0C020 90080-87026
Manufacturer Part Number: 90080-87026 84267-0C020 PT857-35200. Please check the part numbers whether it suits your vehicle before purchasing.
As an affiliate, we earn on qualifying purchases.
As an affiliate, we earn on qualifying purchases.
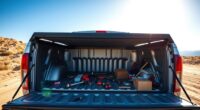
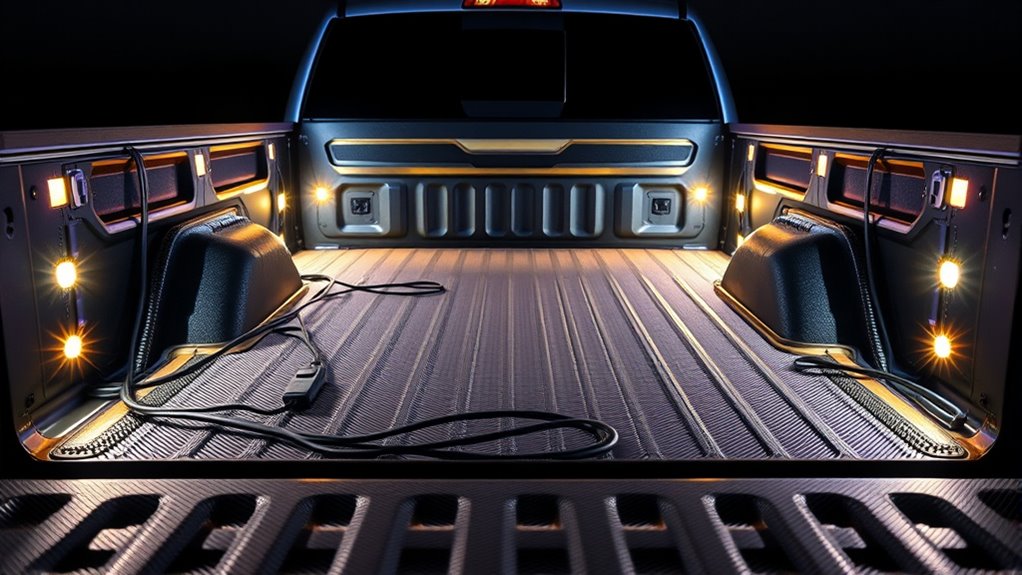
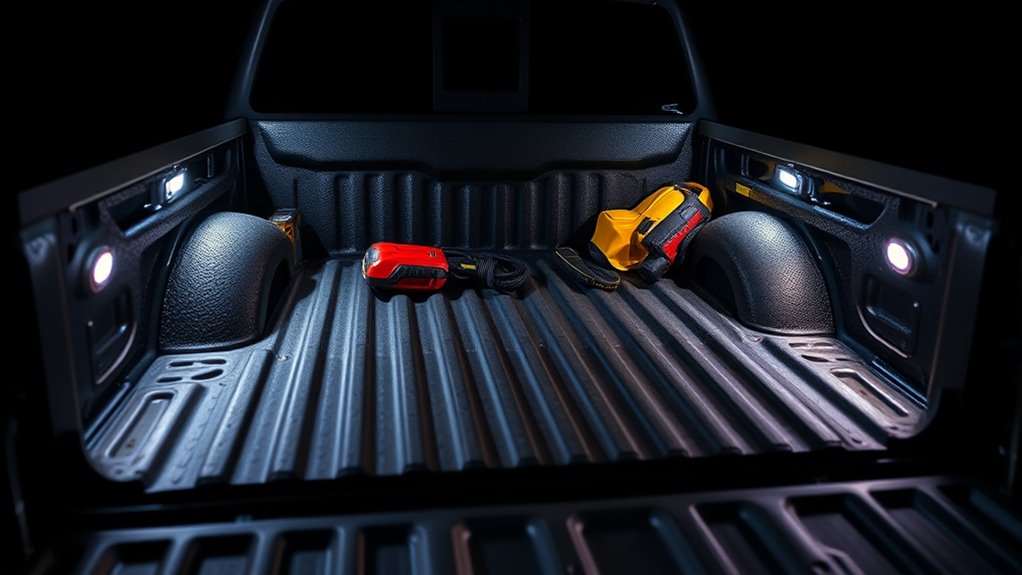
Installation Location and Placement Strategy
To guarantee your LED strip lights provide maximum brightness and coverage, plan their installation along both side rails of the truck bed. Start by installing a dedicated strip in the front section to illuminate the entire cargo area. Make certain that your wiring runs neatly above the fender liner to the underside of the truck for a clean look. When placing the strips, use strong adhesive on textured plastic surfaces, while smooth painted areas require minimal adhesive. Consider the accessibility of the factory wiring harness for routing your wires to the rear taillight connections. This strategic placement not only enhances visibility but also keeps your installation discreet and professional-looking. Additionally, utilizing smart lighting technology can further optimize your truck bed illumination by allowing for remote control and customizable settings. Incorporating high-quality materials will ensure the longevity and durability of your LED installation amidst varying weather conditions. Furthermore, understanding heat distribution can help you select lighting options that effectively manage heat, ensuring consistent performance over time. Moreover, understanding water chemistry can help you select lighting options that are resistant to moisture and humidity, ensuring consistent performance over time. Additionally, evaluating charging speeds can help you choose LED options that are energy-efficient, contributing to a more sustainable setup in your truck bed.
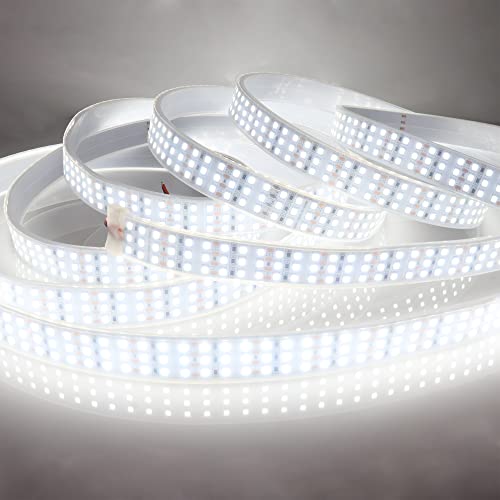
LEDENET 16.4Ft Super Bright Triple Row LED Strip Lights, Daylight White 6000K DC12V 1800LEDs Dimmable Flexible Truck LED Tape Lights, Outdoor Waterproof IP67 Wheel Light Strips
Super Bright Triple Row: 16.4ft white led strip lights with 360LEDs per meter high-brightness LEDs, generates up to…
As an affiliate, we earn on qualifying purchases.
As an affiliate, we earn on qualifying purchases.
Wiring and Electrical Configuration
To get your LED lights up and running, you’ll need to understand the basics of power connections. The relay module plays a vital role in managing power delivery, ensuring everything functions smoothly. You’ll also learn how to trigger the system so your lights activate when you open the tailgate or turn on the dome light. Additionally, be aware of excess wear and tear on your truck bed that may affect the longevity of your LED lights. Proper ventilation considerations can also help prevent overheating of electrical components, extending their lifespan. Utilizing time management strategies during installation can also ensure that the process goes smoothly and efficiently. Furthermore, knowing how to discover trusted businesses for purchasing your LED lights can lead to better quality and service. To enhance your installation experience, consider using quality golf gear that provides reliable performance and durability in various conditions.
Power Connection Basics
How can you guarantee a reliable power connection for your LED lighting? First, connect the power source directly from your truck battery through a fuse holder to a relay module. Use a 16-gauge red wire for the positive connection and a black wire for the negative ground, linking it straight to the battery. The relay receives a trigger signal from your existing dome light circuit using a T-tap connector. A blue wire from the relay will then deliver power to your LED light strips. Make sure to use heat shrink tubing or electrical tape for added protection on all connections. Properly securing these wires ensures they’ll withstand the conditions of the truck bed and function reliably. Additionally, understanding wiring safety is crucial to prevent potential electrical hazards during installation. Be sure to follow user privacy guidelines when working with electrical systems in your vehicle to ensure compliance and safety. It’s important to consider that excessive heat can negatively affect the performance of electrical components, so proper installation and insulation are key. Moreover, using high-quality materials can enhance the durability and functionality of your lighting setup. Incorporating practical solutions into your installation process can help simplify maintenance and ensure longevity of the system.
Relay Module Functionality
While integrating your LED lighting system, understanding the relay module’s functionality is essential for effective operation. The relay acts as a switch, controlling power to your LED strips without overloading your truck’s electrical system. You’ll connect the red wire from your battery to the fuse holder and then to the relay. The black wire should ground directly to the battery. When the relay receives a trigger signal—typically from your dome light—it activates and sends power through the blue wire to illuminate your LEDs. This setup ensures that your lighting activates seamlessly, only drawing power when needed. Properly configuring your relay module will enhance your truck bed’s lighting while maintaining safety and efficiency. Additionally, proper rug care can help prevent dust accumulation around your setup, ensuring that your truck remains clean and the lighting functions optimally. Understanding the principles of electrical safety is also crucial to avoid potential hazards during installation. For optimal performance, consider using the right oil in your electrical components to prevent wear and tear. Furthermore, it’s important to ensure that your truck’s electrical system can handle additional accessories without complications. By incorporating smart technology into your vehicle, you can further enhance your overall experience while on the road.
Triggering the System
As you set up your LED lighting system, triggering it properly is essential for effective operation. To guarantee your lights activate seamlessly, follow these key steps:
- Connect the power source from your truck battery to the relay module using a fuse holder for safety.
- Utilize a T-tap connector to tap into the existing dome light circuit, allowing the relay to receive a trigger signal when the tailgate opens.
- Run the red wire from the battery to the fuse holder and connect the black wire to the negative ground.
- Connect the blue wire from the relay to your LED strips, ensuring they light up automatically with the tailgate or dome light.
Incorporating smart lighting technology can enhance the versatility and efficiency of your LED setup, making it easier to control your truck’s lighting from your smartphone. With these connections secure, you’ll have a fully functional LED lighting system.

Buyers Products Forward and Reverse Relay Module
12 V module powers any reversing motor equipment
As an affiliate, we earn on qualifying purchases.
As an affiliate, we earn on qualifying purchases.
Wire Routing and Cable Management
When routing your wires, you’ll want to keep them concealed for a clean look and to protect them from damage. Make sure your connections are secure, as this will prevent any electrical issues down the line. Using zip ties will help you manage the cables neatly while anchoring them to the factory harness.
Concealed Wiring Techniques
To achieve a clean and professional look for your truck bed LED lighting installation, you’ll want to prioritize concealed wiring techniques. Proper wire routing not only enhances appearance but also protects your wiring from damage. Here are four tips to help you maintain a neat setup:
- Route Wires Above the Fender Liner: This keeps them hidden and reduces the risk of snagging.
- Use the Factory Wiring Harness: Leverage existing pathways to guide your new wires; it saves time and effort.
- Secure with Zip Ties: Fasten new wires to the factory harness to prevent movement and rattling.
- Avoid Moving Parts: Ensure your wiring doesn’t interfere with any mechanical components or suspension parts for safety.
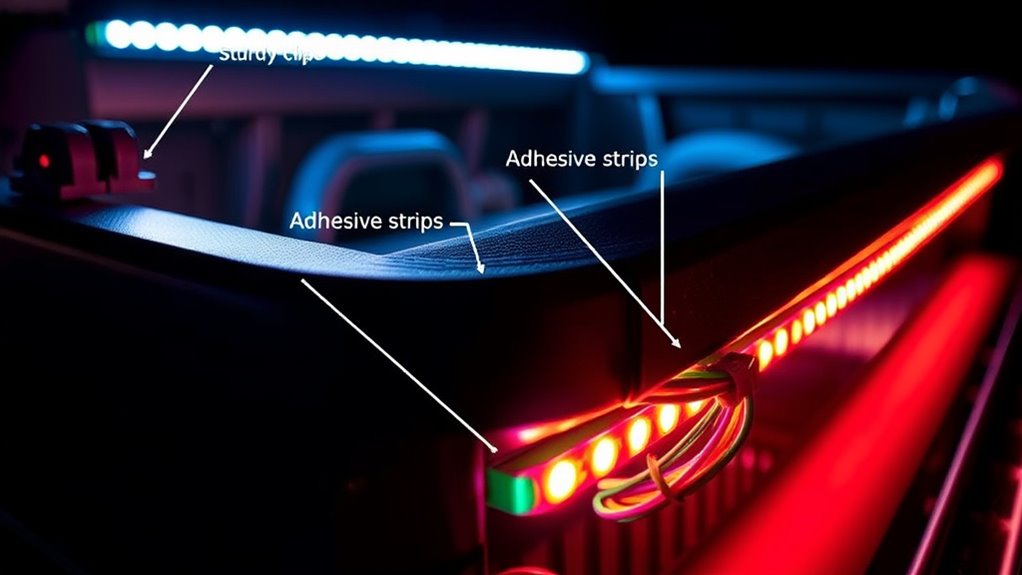
Ensuring Secure Connections
Ensuring secure connections is crucial for the longevity and reliability of your LED lighting setup. Start by routing wires above the fender liner, hiding them beneath the truck bed for a clean look. Use the factory wiring harness as an anchor point for your new electrical lines. Zip ties will help secure your harness to the existing setup, preventing unwanted movement. When splicing wires for the tail light area, ensure you avoid any moving parts. For the best results, solder your connections or use butt connectors for quick joins. Protect soldered joints with heat shrink tubing and wrap all connections with electrical tape for added insulation. These steps will keep your wiring intact and functional for years to come.
Connection Methods and Securing Techniques
While selecting the right connection methods is essential for a reliable LED lighting installation, it’s important to choose techniques that provide both strength and durability. Here’s how you can secure your connections effectively:
- Solder Connections: These create the strongest permanent bonds between wire segments, ensuring long-term reliability.
- Heat Shrink Tubing: Use this to protect soldered joints from moisture and corrosion, extending the life of your installation.
- Butt Connectors: If you prefer a quicker option, these connectors allow for easy, non-soldered installations.
- Electrical Tape: Wrap your connections for additional insulation and protection against wear and tear.
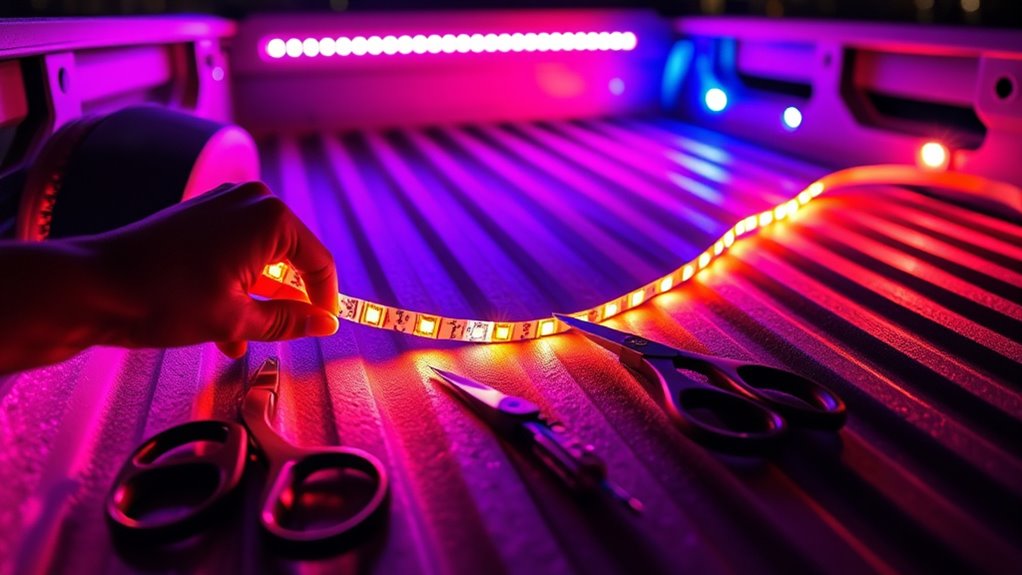
Additionally, make sure the adhesive backing on your LED strips is firmly attached and that taillight fasteners are properly tightened.
Cost Efficiency and Product Options

When it comes to adding LED lighting to your truck bed, you’ll find plenty of affordable strip kits available for under $30. By opting for a DIY installation, you can save on labor costs and customize your setup exactly how you want it. With a range of product options at your fingertips, you can easily choose what fits your budget and needs.
Affordable LED Strip Kits
If you’re looking to enhance your truck bed‘s functionality without breaking the bank, affordable LED strip kits are a smart choice. These kits not only brighten up your cargo area but also offer significant cost savings. Here are four options to contemplate:
- Nilight TR-05 60″ LED Strip Kit – Features 180 LEDs, providing ample light coverage for your truck bed.
- Waterproof LED Strips – Perfect for outdoor use, ensuring durability against the elements.
- Color-Changing LED Kits – Add a fun twist with customizable colors for different occasions.
- Easy-to-Install Kits – Most come with adhesive backing and simple wiring for quick setups.
Investing in any of these options will give you great value while transforming your truck bed into a well-lit workspace.
DIY Installation Savings
Installing LED strip lights in your truck bed is not just about enhancing visibility; it’s also a fantastic way to save money. By opting for a DIY installation, you can eliminate labor costs that professionals would charge. Complete LED bed light kits are available for under $30, making the initial investment quite affordable. You’ll only need basic electrical components, which won’t break the bank. Plus, you can customize the installation to fit your specific needs and preferences. With a few hours of your time, you can achieve excellent results without spending a fortune. This cost-effective approach guarantees your truck bed is well-lit while keeping your budget intact.
Step-by-Step Installation Process
To kick off the installation process, gather all your materials and tools, making sure everything’s within reach for a smooth workflow. Here’s what you’ll need:
Begin your installation by assembling all necessary materials and tools for an efficient workflow.
- LED strip lights – 60″ kits with 180+ LEDs for under $30.
- 16-gauge electrical wire – Red and black for power connections.
- Relay module – For effective power management.
- Fuse holder and fuses – Make sure the fuses are slightly higher than the amp load.
Next, decide on the placement of the LED strips along the side rails and front bed section. Securely attach the strips using their adhesive backing. For wiring, route above the fender liner for a clean look, connecting to your truck’s battery and existing dome light circuit. You’ll be lighting up your truck bed in no time!
Safety Precautions to Consider
While enhancing your truck bed with LED lighting can be an exciting project, it’s crucial to prioritize safety throughout the installation process. First, disconnect the truck battery to prevent any electrical shock or short circuits while working. Always wear protective eyewear and gloves to shield yourself from sharp tools and electrical components. When handling wires, make sure to use wire strippers carefully to avoid injury. If you’re using a soldering iron, keep it away from flammable materials and always work in a well-ventilated area. Additionally, double-check your connections for proper insulation using heat shrink tubing or electrical tape to prevent any shorts. Following these precautions will help ensure a safe and successful installation.
Troubleshooting Common Issues

If you encounter issues with your newly installed LED lighting in the truck bed, don’t panic; troubleshooting is often straightforward. Here are some common problems and their solutions:
- Lights Won’t Turn On: Check your connections, ensuring the positive and negative wires are securely connected to the battery and relay.
- Flickering Lights: This may indicate loose connections; inspect all wiring and connectors for snug fits.
- Dim Lights: If the LEDs seem weak, verify the power source and that the relay is functioning correctly.
- Lights Activate with Dome Light: Ensure the trigger wire is only connected to the dome light circuit and not shorted to other wires.
Enhancing Your Truck Bed Lighting Experience
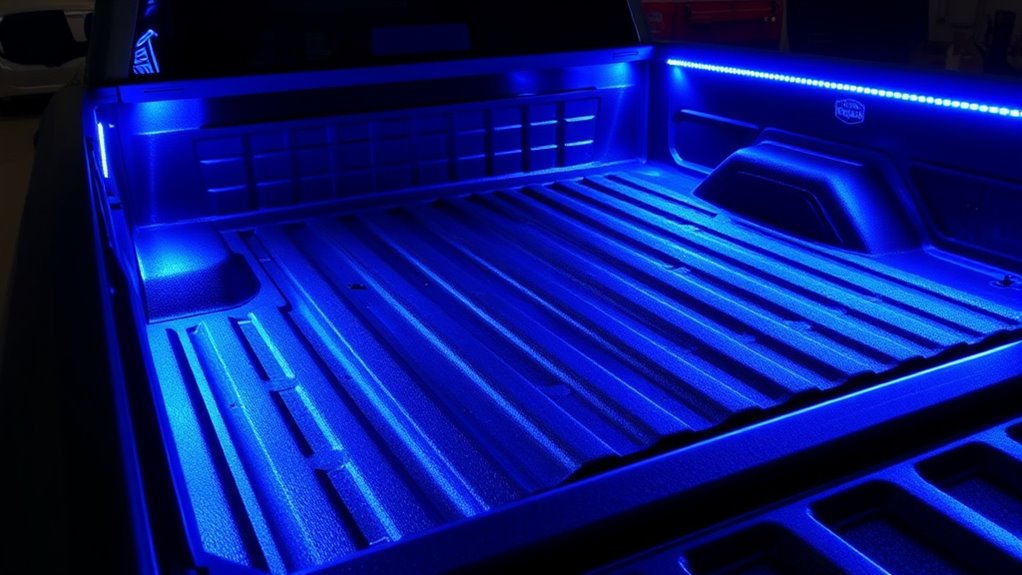
After addressing any issues with your LED lighting system, you can take your truck bed lighting to the next level for an improved experience. Consider adding features like a remote control or smart lighting options for convenience. You can also enhance the ambiance with color-changing LED strips, perfect for tailgating or outdoor events.
| Feature | Benefits | Cost |
|---|---|---|
| Remote Control | Easy access from a distance | $15 – $30 |
| Color-Changing Strips | Set the mood with vibrant colors | $20 – $50 |
| Smart Lighting | Control from your smartphone | $30 – $70 |
These additions not only improve functionality but also elevate your truck bed’s aesthetic appeal. Enjoy your newly enhanced lighting experience!
Frequently Asked Questions
Can I Use LED Strips for Other Areas of My Truck?
Absolutely, you can use LED strips in other areas of your truck! They’re versatile and perfect for enhancing different spots like under the dashboard, in the footwells, or even inside the cab. Just make sure you choose waterproof strips for outdoor areas. Secure them with adhesive or clips, and connect them to your existing electrical system. You’ll enjoy not only practical lighting but also a cool aesthetic upgrade for your vehicle!
What Is the Lifespan of LED Strip Lights?
Have you ever wondered how long those LED strip lights will really last? Generally, you can expect LED strip lights to last around 25,000 to 50,000 hours, depending on quality and usage. They’re energy-efficient and durable, making them a great choice for various applications. Just remember, proper installation and care can help maximize their lifespan. So, if you’re thinking of adding them to your truck or any other area, you’re making a smart decision!
Are There Waterproof Options for LED Strips?
Yes, there are waterproof options for LED strips. You can look for LED strips labeled as IP65 or higher, which means they’re resistant to water and dust. These strips can withstand outdoor conditions, making them perfect for your truck bed. When installing, guarantee you seal any exposed connections with heat shrink tubing or electrical tape to enhance durability. This way, you can enjoy bright lighting without worrying about moisture damage.
How Bright Are the LED Strips in Daylight?
In daylight, LED strips can be surprisingly bright, but their visibility depends on the intensity of sunlight. You’ll notice they shine brightly against darker surfaces, making them useful for low-light situations. However, during direct sunlight, you might find them less noticeable. It’s best to test your strips in various conditions; this way, you can see exactly how they perform when the sun’s out and adjust your expectations accordingly.
Can I Install LED Strips Without Soldering?
Yes, you can install LED strips without soldering. Instead, use butt connectors or crimp connectors for quick and easy wire connections. Just strip the ends of your wires, insert them into the connectors, and crimp them securely. This method eliminates the need for soldering tools and makes the installation process faster. Just make sure to wrap connections with electrical tape or use heat shrink tubing for added protection against moisture.
Conclusion
By adding cheap LED lighting to your truck bed, you’re transforming it into a beacon of functionality, much like a lighthouse guiding boats to safety. With the right materials and a little effort, you can create a well-lit space that makes loading and unloading easier, even in the dark. So go ahead and brighten up your truck bed—you’ll enjoy the convenience and safety that comes with it every time you hit the road.