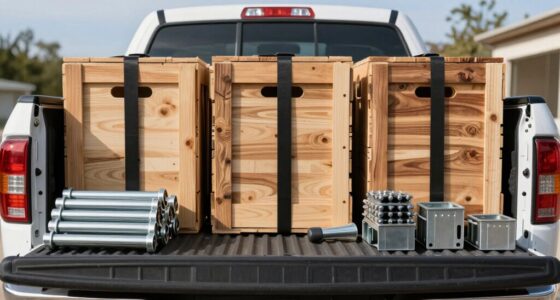
This guide provides clear instructions for installing a truck bed organizer, designed for truck owners wanting to optimize cargo space. The process involves selecting the right organizer, preparing your truck bed, and securely installing the system. Suitable for those with basic tools and some DIY experience, this task takes approximately 30 to 45 minutes to complete. Whether you carry tools, equipment, or recreational gear, a properly installed bed organizer keeps your cargo secure and accessible.

Get business pricing on garage and car supplies
- Business-only prices and quantity discounts
- Tax-exempt purchasing
- Multiple users, one account, clear invoices

Tmat Truck Bed Organizer Mat with 6 Blockers, Universal Fit for 5’6"–5’9" Beds
- ✔ Brand: Tmat
- ✔ Model: TMAT-KIT-68X50
- ✔ Bed Length Fit: 5’6" to 5’9"

Rough Country Slide-Out Truck Bed Cargo Tray for Beds 5’7" and Longer
- ✔ Material: High-density polyethylene
- ✔ Dimensions: 62.29 × 23.6 × 4 inches
- ✔ Compatible bed length: 5’7" or longer
Tmat Truck Bed Organizer Storage System Slide Out Mat (Universal Fit for Standard Beds 6’6" to 6’9")
- ✔ Brand: Tmat
- ✔ Model Number: TMAT-KIT-68X50
- ✔ Part Number: TMAT-KIT-80X50
Difficulty: Intermediate | Time: 30-45 minutes
What You’ll Need
Tools & Materials:
- Drill with screwdriver bits
- Measuring tape
- Marker or chalk
- Wrench or socket set
- Screws or bolts (usually included with organizer)
Knowledge:
- Basic familiarity with using power tools
- Understanding of truck bed dimensions
Check the organizer’s mounting requirements before starting. Clear the truck bed of any debris and items to ensure accurate measurements and safety during installation.
Tmat Truck Bed Organizer Mat with 6 Blockers, Universal Fit for 5’6"–5’9" Beds
This pick stands out for its **modular, customizable design** that allows users to configure cargo securely without drilling or permanent hardware. The **tool-free installation** makes it accessible for DIYers and casual users, while the **adjustable blockers** provide flexibility for different cargo shapes. Compared with slide-out trays, it offers more versatility for various cargo types, but the **universal fit** may not suit every truck bed perfectly, especially if dimensions vary slightly. Its made-in-USA quality adds to its appeal, though some users might need to add bolt-down hardware for a permanent setup.
Pros:
- Adjustable blockers for flexible cargo configurations
- Easy, tool-free installation without drilling
- Made in the USA for quality assurance
Cons:
- Universal fit may not suit all trucks perfectly
- Optional bolt-down hardware needed for permanent setup
Best for: DIYers and casual users seeking a flexible, no-hassle cargo organization solution
Not ideal for: Users needing a permanent, heavy-duty setup or with very specific truck bed dimensions
Bottom line: A versatile, easy-to-install modular system ideal for those who want flexibility without permanent modifications.
“A versatile, easy-to-install modular system ideal for those who want flexibility without permanent modifications.”
Rough Country Slide-Out Truck Bed Cargo Tray for Beds 5’7" and Longer
This option excels in providing **quick, easy access** to cargo via its **slide-out tray**, making it ideal for users who frequently need to reach gear stored in the back of their truck. Its **weather-resistant, UV-protected construction** ensures durability in various outdoor conditions. The **adjustable tie-down straps and built-in anchor points** help secure cargo during transit, reducing shifting and potential damage. Compared with modular mats, this tray offers more straightforward access but is limited to trucks with a bed length of at least 5’7", and its 62.29-inch length might not fit shorter cargo areas, making it less versatile for some users.
Pros:
- Slide-out tray for easy cargo access
- Weather-resistant and UV-protected
- Secure cargo with tie-down straps and anchor points
Cons:
- Requires a truck bed at least 5’7" long
- Limited fit for shorter beds or smaller cargo areas
Best for: Outdoor enthusiasts and professionals requiring quick access and weather resistance
Not ideal for: Owners of shorter beds or those preferring a fully modular or customizable system
Bottom line: A durable, weather-resistant tray that prioritizes convenience and quick access for longer truck beds.
“A durable, weather-resistant tray that prioritizes convenience and quick access for longer truck beds.”
Tmat Truck Bed Organizer Storage System Slide Out Mat (Universal Fit for Standard Beds 6’6" to 6’9")
This pick offers a **modular, slide-out design** that supports **custom cargo configurations** without the need for drilling. Its **universal fit** for standard beds from 6’6" to 6’9" makes it highly adaptable across many truck models like the F-150, Silverado, and Tundra. The **assembly of panels and strips** might be more involved compared to simpler mats, but the **durable materials** and **made-in-USA quality** ensure long-term reliability. It’s especially suited for users who want a **permanent**, customizable cargo system but are comfortable with some assembly effort. The absence of included bolt-down hardware could be a drawback for those seeking a fully fixed installation.
Pros:
- No drilling or vehicle modifications required
- Modular design supports custom configurations
- Made in the USA with durable materials
Cons:
- Requires assembly of multiple panels and strips
- Optional bolt-down hardware not included for permanent installation
Best for: Professional contractors or serious outdoor users seeking a durable, customizable system
Not ideal for: Casual users or those preferring quick, tool-free setups with minimal assembly
Bottom line: A robust, customizable slide-out system ideal for heavy-duty use and long-term setups in standard truck beds.
“A robust, customizable slide-out system ideal for heavy-duty use and long-term setups in standard truck beds.”
As an Amazon Associate we earn from qualifying purchases.
Before You Start
Ensure your truck is parked on a flat surface with the parking brake engaged. Read all manufacturer instructions for your specific truck bed organizer. Confirm that all parts and tools are available before beginning to avoid interruptions. Be cautious when handling power tools to prevent injury.
Step-by-Step Instructions
Step 1: Measure your truck bed
Use the measuring tape to measure the length, width, and height of your truck bed. Record these dimensions for selecting an organizer that fits well.
Measure the distance between tie-down points and any areas where the organizer will be mounted.
Tip: Re-measure to verify accuracy, especially if your truck bed has irregular features or protrusions.
Check: You have accurate measurements that match the organizer’s specifications, ensuring a proper fit.
Step 2: Select the appropriate truck bed organizer
Choose an organizer that fits within your measurements and suits your storage needs (e.g., bins, dividers, shelves). Confirm it includes all necessary mounting hardware.
Tip: Opt for a modular system if you want flexibility or plan to upgrade later.
Check: The selected organizer fits your truck bed dimensions and meets your storage requirements.
Step 3: Clear and prepare the truck bed
Remove all items from the truck bed and sweep or wash out debris. Ensure the surface is dry and free of obstructions.
Tip: Check for any damage or rust in mounting areas that might interfere with installation.
Check: The truck bed is clean, dry, and ready for installation with no loose debris.
Step 4: Position the organizer in the truck bed
Place the organizer in its intended location, aligning it with tie-down points and edges. Adjust for a snug fit and proper access.
Tip: Use a level if the organizer has horizontal components to ensure it sits evenly.
Check: The organizer is positioned correctly, with all mounting points accessible and aligned.
Step 5: Mark the mounting points
Use a marker or chalk to mark where the mounting holes will go, based on the organizer’s pre-drilled holes or mounting brackets.
Tip: Double-check measurements before marking to ensure accuracy.
Check: All mounting points are accurately marked and aligned with the organizer’s holes.
Step 6: Drill holes for mounting
Using the drill and appropriate drill bit, carefully drill holes at the marked locations. Wear safety goggles.
Tip: Start with a smaller bit to create pilot holes, then enlarge to the required size.Be cautious of any wiring or hidden components behind the truck bed surface.
Check: Holes are clean, correctly placed, and free of debris, ready for mounting hardware.
Step 7: Attach the organizer securely
Insert screws or bolts through the organizer’s mounting holes into the drilled holes. Tighten using a wrench or screwdriver until secure.
Tip: Do not overtighten to avoid damaging the organizer or stripping threads.Use washers if recommended for added stability.
Check: The organizer is firmly attached without wobbling or movement.
Step 8: Test the installation
Apply gentle pressure to different parts of the organizer to verify stability. Check that all fasteners are tight.
Tip: Ensure the organizer can withstand typical cargo loads without shifting.
Check: The installation holds firm under light to moderate force, confirming secure attachment.
Common Mistakes to Avoid
- Using incorrect or incompatible hardware for mounting. — Use hardware specified by the organizer manufacturer or suitable for your truck bed material.
- Not aligning mounting holes properly, leading to unstable installation. — Double-check measurements and markings before drilling, and use a level if necessary.
- Over-tightening screws or bolts, causing damage to the organizer or truck bed. — Tighten hardware until snug, avoiding excessive force.
Troubleshooting
Problem: The organizer wobbles after installation.
Solution: Check all fasteners and tighten any loose bolts. Reassess the mounting points for proper alignment.
Problem: Holes don’t align with mounting points.
Solution: Verify measurements, re-mark, and adjust the positioning as needed before drilling again.
Problem: The organizer doesn’t fit within the truck bed dimensions.
Solution: Choose a smaller or more adaptable model that matches your measurements, or modify the placement slightly.
What Success Looks Like
The truck bed organizer is securely mounted, does not wobble or shift, and fits well within the truck bed without interfering with tie-downs or other features. You can load cargo into the organizer and access it easily without concern for stability or damage.
Next Steps
Regularly check the fasteners for tightness, especially after hauling heavy loads. Clean the organizer periodically to prevent dirt buildup. Consider adding accessories like tie-down straps or dividers for enhanced cargo security. When upgrading or removing the organizer, follow similar steps to detach and prepare the truck bed.
Frequently Asked Questions
Can I install a truck bed organizer myself?
Yes, with basic tools and some DIY experience, most truck owners can install their organizer following this guide. Read all instructions and measure carefully.
What if my truck bed has a liner or coating?
Use appropriate hardware such as self-drilling screws or anchors designed for coated or lined beds. Avoid damaging the liner during installation.
How do I maintain my truck bed organizer?
Regularly clean the organizer with mild soap and water. Check fasteners periodically and tighten as needed to maintain stability.
Can I remove and re-install the organizer later?
Yes, if mounted with bolts or screws, you can remove it for cleaning or resale. Keep all hardware for future re-installation.
Fall Picks
fall essentials
As an affiliate, we earn on qualifying purchases.