Start by evaluating the mud and gathering your tools like a pressure washer, brushes, and foam cannon. Begin with a pre-rinse to loosen dirt, paying attention to wheels, undercarriage, and crevices. Proceed with targeted cleaning, applying wheels cleaner and foam wash for full coverage. Dry thoroughly and protect surfaces with wax or sealant. For more tips on achieving a showroom shine and maintaining your truck, keep going to discover detailed steps and professional tricks.
Key Takeaways
- Begin with a thorough pre-rinse using a pressure washer to remove loose mud from the roof, undercarriage, and crevices.
- Focus on targeted mud removal with high-pressure tools and dedicated wheel cleaners, scrubbing wheels and tires thoroughly.
- Apply foam wash to cover all surfaces, including hard-to-reach areas, and let it dwell before rinsing off completely.
- Dry the vehicle promptly with microfiber towels, then protect the surface with wax, sealant, or hydrophobic sprays for added resistance.
- Conduct a final inspection, spot clean any missed spots or water spots, and wipe down door jambs, wheel wells, and undercarriage for a showroom finish.

Westinghouse ePX3100v Electric Pressure Washer, 2100 Max PSI 1.76 Max GPM, Built-in Carry Handle, Detachable Foam Cannon, Pro-Style Steel Wand, 3-Nozzle Set, for Cars/Fences/Driveways/Home/Patios
Delivers 2100 max PSI and 1.76 max GPM (at lowest pressure), and 1800 rated PSI and 1.2 rated…
As an affiliate, we earn on qualifying purchases.
As an affiliate, we earn on qualifying purchases.
Assessing the Muddy Conditions and Preparing Your Equipment

Before you begin cleaning your muddy off-road truck, it’s essential to evaluate how heavy the mud is and gather the right tools. Check how thick and caked-on the mud is, especially on the wheels, undercarriage, and crevices. If the mud is dry and crusty, you’ll need stronger equipment like a pressure washer or high-pressure nozzle. For wetter mud, a garden hose may suffice. Collect your brushes, sponges, microfiber towels, and cleaning solutions beforehand. Make sure you have a bucket with soapy water, a rinse bucket, and any specialty cleaners for wheels and tires. Preparing your equipment in advance saves time and prevents you from scrambling mid-cleaning. This assessment helps you choose the proper approach and ensures a smoother, more effective cleaning process. Additionally, understanding your projector technology can help you select appropriate cleaning methods for delicate surfaces.

Adam's Polishes Wheel & Tire Cleaner 16oz – Professional All in One Car Wash Wheel Well Cleaning Spray for Car Detailing | Safe On Most Rim Finishes
✅ ELIMINATES DIRT, BROWNING, AND BRAKE DUST – Which part of your car takes the biggest beating? Your…
As an affiliate, we earn on qualifying purchases.
As an affiliate, we earn on qualifying purchases.
Pre-Rinse and Debris Removal Techniques

Start with an effective rinse using a pressure washer or garden hose to remove loose mud and debris. Focus on the roof, hood, and upper surfaces first to prevent recontamination, then spend extra time on wheel wells and crevices. Use a high-pressure nozzle carefully to dislodge caked mud without scratching the paint. Incorporate environmentally-friendly cleaning methods aligned with sustainable practices to minimize water and chemical usage during the pre-rinse.
Effective Rinsing Strategies
Effective rinsing is essential for removing loose mud and debris without damaging your truck’s paint. Start with a high-pressure hose or pressure washer, focusing on the roof, hood, and upper surfaces first. This method ensures that mud is lifted efficiently while protecting delicate surfaces. Pay extra attention to wheel wells, undercarriage, and crevices where dirt hides. Use a high-pressure nozzle to dislodge caked mud gently, avoiding aggressive scrubbing that could scratch the paint. Keep the water moving smoothly across the surface to lift dirt without forcing debris into the paint or seams. Rinse thoroughly, ensuring all loose mud and debris are washed away. Proper rinsing sets a clean base for further detailing and prevents mud from recontaminating your truck during washes. Additionally, employing connection between parts can help ensure that your entire vehicle receives an effective rinse.
Targeted Mud Removal
To efficiently remove stubborn mud and debris, focus on targeted pre-rinse techniques that break down heavy build-up without damaging your truck’s paint. Use a pressure washer or garden hose with a high-pressure nozzle to focus on problem areas like the roof, wheel wells, undercarriage, and crevices. Spend extra time on these spots to dislodge caked mud and grime. Avoid scrubbing immediately after rinsing to prevent embedding grit into the paint. Imagine a quick, focused attack:
- Rinsing from top to bottom to prevent recontamination
- Concentrating on wheel wells and undercarriage for deep cleaning
- Using high pressure to loosen stubborn mud
- Skipping scrubbing right away to protect your paint surface
This approach ensures efficient debris removal without unnecessary damage. Properly maintaining your pressure washer and understanding its operating procedures can further enhance your cleaning effectiveness.

Tool Daily Foam Cannon with 1/4 Inch Quick Connector, 1 Liter, 5 Pressure Washer Nozzle Tips
Adjustable Snow Foam Lance with 1/4" quick connection fitting. 𝐍𝐨𝐭 𝐅𝐢𝐭 𝐆𝐚𝐫𝐝𝐞𝐧 𝐇𝐨𝐬𝐞, 𝐖𝐚𝐭𝐞𝐫 𝐇𝐨𝐬𝐞 𝐨𝐫 𝐘𝐨𝐮𝐫 𝐅𝐚𝐮𝐜𝐞𝐭…
As an affiliate, we earn on qualifying purchases.
As an affiliate, we earn on qualifying purchases.
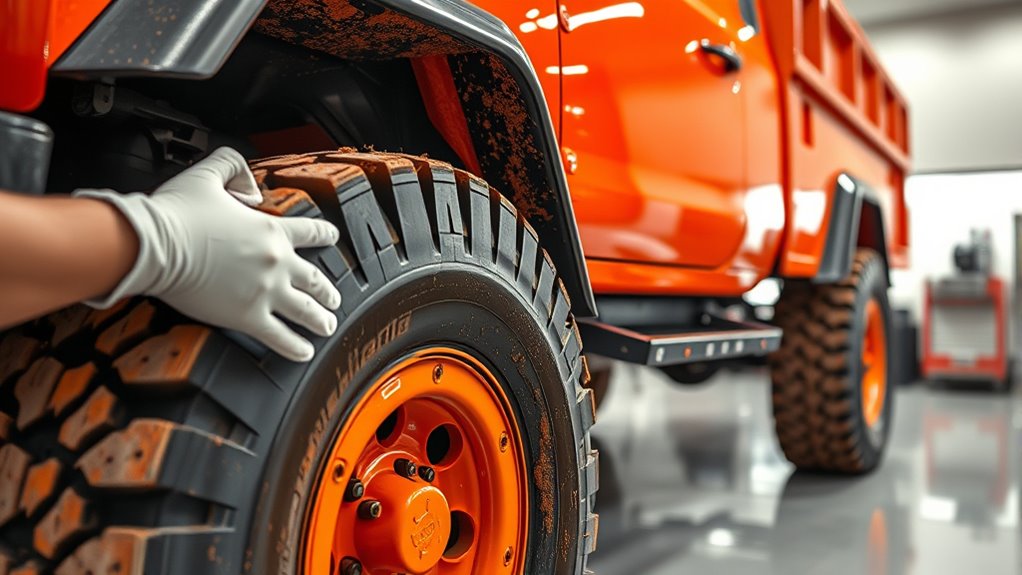
Proper Wheel and Tire Cleaning Procedures
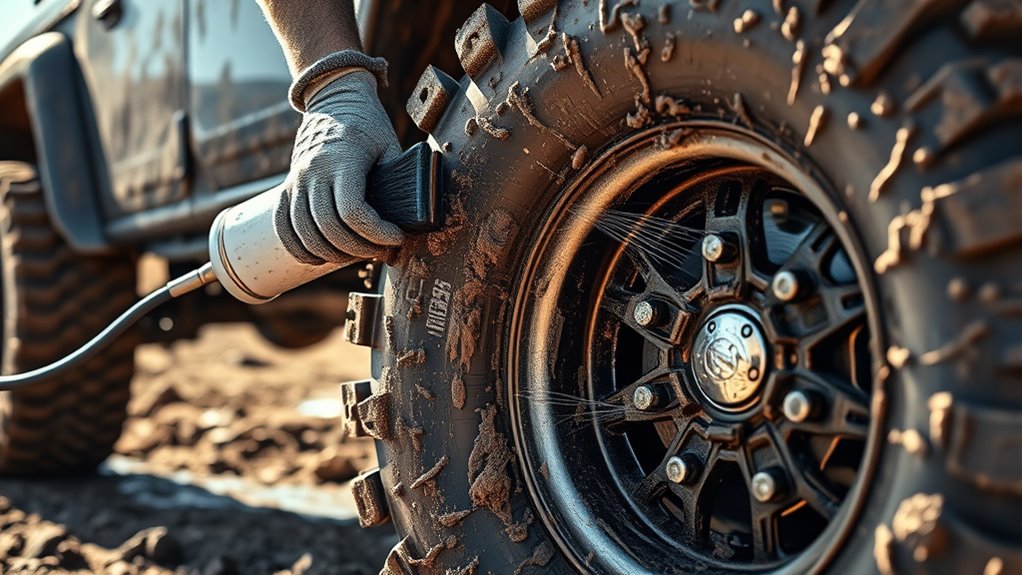
Cleaning your wheels and tires thoroughly is essential for maintaining your truck’s appearance and preventing corrosion. Start by applying a dedicated wheel cleaner to break down brake dust, grime, and dried mud. Let it sit for a few minutes to loosen stubborn dirt. Use a stiff-bristled wheel brush or tire brush to scrub all surfaces, including lug nuts, inner rims, and sidewalls. Pay special attention to crevices and hard-to-reach areas. Rinse the wheels and tires thoroughly with a high-pressure nozzle to remove all chemical residue and loosened debris. For tougher grime, consider using a foaming wheel cleaner for better penetration. Always clean the wheels before washing the body to prevent dirty runoff from contaminating freshly cleaned panels. Dry with a microfiber towel to avoid water spots. Incorporating proper water management techniques during cleaning can help prevent water spots and ensure a spotless finish.

HOMEXCEL Professional Large Microfiber Car Drying Towels 2 Pack, Lint Free, Scratch Free, Highly Absorbent Drying Towel for Cars, SUVs, RVs, Trucks, and Boats,31" x 24",Grey
Premium Material: Professional microfiber drying towels are crafted from an advanced blend of 87% polyester and 13% polyamide….
As an affiliate, we earn on qualifying purchases.
As an affiliate, we earn on qualifying purchases.
Applying the Foam Cannon and Main Wash Method

After thoroughly cleaning your wheels and tires, it’s time to prepare for the main wash. Fill your foam cannon with a quality truck shampoo or citrus foam, and attach it to your pressure washer. Spray a thick, even layer of foam over the entire vehicle, making sure to cover all surfaces, including hard-to-reach areas like crevices and wheel wells. Let the foam dwell for 5–10 minutes to loosen stubborn mud and grime. During this time, imagine the foam clinging to every inch, breaking down dirt. Reapply foam if needed for heavily soiled spots. Once the dwell time is up, rinse the vehicle thoroughly with clean water, ensuring all foam and loosened debris are washed away, leaving a clean surface ready for the main wash. Proper foam coverage helps maximize dirt removal and prevents scratching during the wash.
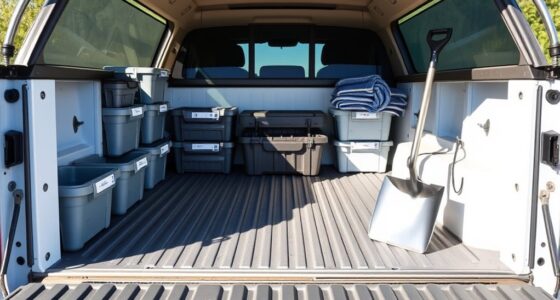
Interior and Carpet Detailing for a Fresh Finish

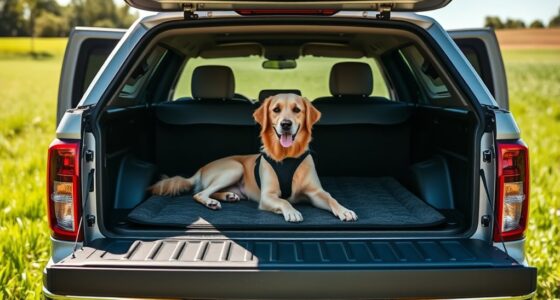
Start by removing all floor mats and vacuuming the carpets thoroughly to eliminate loose dirt and debris. Focus on crevices and under seats to guarantee no mud or grit remains. Spray a carpet cleaner or extraction solution on heavily soiled areas, especially footwells. Use a soft-bristle brush to agitate the carpet, lifting embedded dirt and mud. Then, extract moisture and dirt with a wet/dry vacuum or carpet extractor. For stubborn spots, repeat the process or spot-treat with a stain remover. Once cleaned, allow the carpets to dry completely before replacing mats. This prevents mold and odors from developing. Finish by wiping down interior surfaces with a microfiber cloth, paying attention to vents, door panels, and other hard surfaces for a fresh, clean feel throughout your truck’s interior. Incorporating simple cleaning routines can help maintain a calmer, more organized environment inside your vehicle.
Drying and Protecting the Vehicle Surface

After rinsing, use a microfiber towel to dry your truck with long, smooth strokes from top to bottom, paying close attention to seams and crevices. To prevent water spots, re-wet and dry any areas where spots start to form, especially in sunlight. Once dry, apply a protective coating like wax or sealant to shield the surface and make future cleaning easier.
Proper Towel Drying Techniques
Proper towel drying is essential to avoid water spots and preserve the finish of your truck. To do this effectively, use a clean, soft microfiber towel and gently pat or wipe in straight lines from top to bottom. Avoid circular motions that can cause swirl marks. Keep the towel dry and switch to a fresh section as it becomes saturated. Be thorough around seams, crevices, and hard-to-reach areas to prevent leftover moisture.
Consider these steps:
- Use multiple microfiber towels for different sections or drying stages
- Apply gentle pressure to absorb water without scratching
- Focus on high-risk areas prone to water spots, like mirrors and trim
- Dry thoroughly to ensure no residual moisture remains, especially in joints and tight spots
Preventing Water Spots Effectively
To prevent water spots from marring your truck’s finish, it’s essential to dry it thoroughly and quickly after washing. Use a clean microfiber towel to wipe down all surfaces with long, straight strokes, paying close attention to seams, crevices, and areas prone to spotting. If water spots start to form, reapply soapy water and dry again, especially in direct sunlight, to guarantee no water remains on the surface. Avoid letting water sit and evaporate naturally, which increases the risk of spots. Once dry, consider applying a wax or sealant to create a protective barrier that repels water and mud. For added protection, use a hydrophobic spray that helps water bead and roll off, keeping your truck looking spotless longer. Proper drying techniques are crucial for maintaining a pristine finish and preventing damage over time.
Protective Coating Application
Applying a protective coating is a crucial step to preserve your truck’s finish and make future cleaning easier. Once your vehicle is thoroughly dry, you can begin applying wax, sealant, or a hydrophobic spray. Ensure the surface is clean and free of water spots. For even coverage, work in small sections, using a microfiber applicator pad or cloth. As you apply, use circular or straight strokes, and don’t rush. Pay attention to seams, crevices, and hard-to-reach areas. After applying, buff the surface with a clean microfiber towel to enhance shine. Consider reapplying a hydrophobic spray for extra water and mud resistance. Regular coating maintenance keeps your truck protected, shiny, and easier to clean after muddy adventures. Incorporating local automation techniques can help streamline this process and ensure consistent application.
Additional Tips for Maintaining a Mud-Free Off-Road Truck

Regularly inspecting your truck after off-road adventures helps catch mud and dirt before they harden and become harder to remove. Look for any stubborn spots or areas where mud might have lodged, especially around wheel wells and undercarriage components. Address these immediately with a quick rinse or light scrub to prevent buildup. Keep your truck protected by applying a quality wax or sealant after each wash, which creates a barrier against mud and water. Consider installing splash guards or mud flaps to minimize mud splatter during future off-road trips. Also, regularly check and clean your air filters and undercarriage components to prevent mud from causing damage or rust. Consistent maintenance reduces cleaning time and keeps your truck in top condition. Additionally, using specialized dog-friendly cleaning products can help ensure your vehicle remains safe and odor-free if your furry friend is involved in off-road adventures.
Final Inspection and Touch-Ups for a Showroom Shine
After completing the main washing and detailing steps, it’s essential to conduct a thorough final inspection to guarantee every surface looks its best. Carefully examine the entire truck, checking for missed spots or water spots. Look closely at the paint, windows, and trim to ensure they’re spotless and streak-free. Use your fingers or a microfiber cloth to feel for any residual dirt or rough patches. Address any imperfections with touch-up spray or polish. Here’s what to focus on:
Finish with a thorough inspection, polishing any spots for a spotless, showroom-ready truck.
- Spot clean streaks or water spots on glass and paint
- Touch up any dull or uneven areas with polish or wax
- Wipe down door jambs, hinges, and crevices
- Check wheel wells and undercarriage for missed mud or grime
This final step guarantees your truck shines like a showroom masterpiece.
Frequently Asked Questions
How Often Should I Clean My Off-Road Truck After Muddy Adventures?
You should clean your off-road truck as soon as possible after muddy adventures, ideally within 24 to 48 hours. Prompt cleaning prevents mud from drying and hardening, which makes it tougher to remove and can damage your paint. Regularly washing your truck after each off-road trip keeps it looking good, protects the finish, and guarantees any mud, dirt, or debris doesn’t cause long-term problems.
Can I Use a Pressure Washer on All Truck Surfaces Safely?
Using a pressure washer on your truck is like wielding a powerful tool—effective but requiring caution. You can safely use it on most surfaces if you keep the nozzle at a safe distance and use a lower pressure setting. Focus on open areas like the body panels, wheel wells, and undercarriage. Avoid aiming directly at sensitive spots like vents, seals, or electrical components to prevent damage.
What’s the Best Way to Prevent Water Spots During Drying?
To prevent water spots during drying, you should dry your truck promptly with a clean microfiber towel, using long, straight strokes from top to bottom. Pay special attention to seams, crevices, and areas prone to spots. Re-wet any spots with a light mist of water and dry again if needed, especially in direct sunlight. Applying a wax or sealant afterward helps create a protective barrier against water spots and future dirt buildup.
How Do I Remove Stubborn Mud Stains From Carpets and Upholstery?
Imagine you’re back in the days of old, fighting stubborn mud stains like a true knight. To remove them from carpets and upholstery, first spray a heavy-duty cleaner or soil extractor on the affected areas. Let it sit for a few minutes, then scrub gently with a soft-bristle brush. Use a wet/dry vacuum or extractor to lift out the loosened dirt, leaving your interior fresh and clean.
Which Wax or Sealant Provides the Longest-Lasting Protection?
You should choose a high-quality synthetic sealant or wax for the longest-lasting protection. Products like carnuaba wax offer good shine but don’t last as long, while synthetic sealants provide durability up to six months or more. Apply evenly with a foam applicator or microfiber cloth, and guarantee the surface is clean and dry beforehand. Regular reapplication helps maintain protection, especially after off-road adventures where mud and debris are common.
Conclusion
Think of your truck as a brave explorer returning from a wild adventure. With patience and care, you’ve polished its armor, revealing a gleam that mirrors its daring spirit. Just as a knight tends to their steed, your attention preserves your vehicle’s strength and beauty. Keep this ritual alive after every muddy quest, and your truck will continue to shine like a legendary champion, ready for the next adventure that awaits beyond the horizon.