To run solar power to your truck bed for off-grid trips, choose durable, high-rated panels like 100W rigid or semi-flexible options, and secure them with non-penetrating mounts such as bed rails or clamps. Connect them safely using weatherproof wiring and secure enclosures, making sure to orient the panels toward the sun and adjust tilt seasonally for best exposure. Proper placement, wiring, and maintenance are key—keep exploring to learn how to maximize and troubleshoot your setup effectively.
Key Takeaways
- Select high-wattage, durable solar panels suitable for mobile use, and choose mounting options like bed rails or clamps to avoid leaks.
- Position panels in unobstructed areas facing the sun, adjusting tilt seasonally for optimal exposure.
- Use waterproof MC4 connectors, short wiring runs, and secure cables with ties and conduit to ensure safe, weather-resistant connections.
- Mount batteries in vented, lockable enclosures secured to prevent movement, and keep the area dry and well-ventilated.
- Regularly inspect, clean panels, check wiring, and monitor system performance to ensure long-term reliability during off-grid trips.
Top picks for "solar power truck"
Open Amazon search results for this keyword.
As an affiliate, we earn on qualifying purchases.
Selecting the Right Solar Panels for Your Truck Bed

Choosing the right solar panels for your truck bed depends on your specific power needs, budget, and mounting preferences. If you need high output, look for panels rated at 100W or more per unit. Rigid panels are durable and efficient but require drilling and permanent mounting, making them ideal for long-term setups. Semi-flexible panels are lightweight and easier to install, sticking directly to your truck bed with high-bond tape or secured with screws. If you prefer a non-penetrating solution, consider panels that can be mounted on roof racks or bed rails. Keep shading in mind—avoid placing panels where truck accessories or shadows might block sunlight, as even partial shading can drastically reduce your system’s output. Balancing your choices to match your energy demands and installation preferences is essential for an effective off-grid solar setup. Additionally, selecting panels that are compatible with European cloud innovation can ensure your off-grid system benefits from energy-efficient and sustainable technology options.
Choosing the Best Mounting System for Off-Grid Use
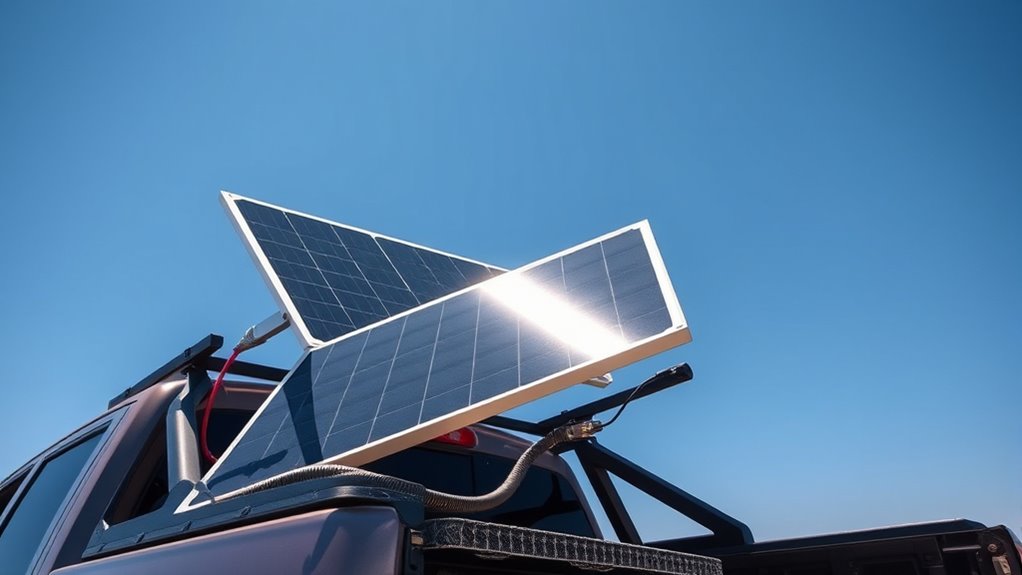
When choosing a mounting system, you want options that won’t compromise your truck’s integrity or water resistance. Non-penetrating mounts like bed rails offer a secure solution without drilling holes, while flexible systems give you adjustability for ideal sun exposure. Consider your need for stability and flexibility to find the best fit for off-grid use. Additionally, selecting a mounting system with durable construction ensures longevity and reliable performance during your trips.
Non-Penetrating Options
For off-grid truck bed solar setups, non-penetrating mounting options are ideal because they eliminate the risk of water leaks and reduce installation complexity. These mounts use adhesives, clamps, or existing hardware to secure panels without drilling. They’re perfect for temporary setups or if you want to avoid modifying your truck. You can choose from various systems based on panel size and weight. Here’s a quick overview:
| Mount Type | Key Features |
|---|---|
| Roof rack systems | Secure, adjustable, no drilling needed |
| Bed rail clamps | Clamp onto existing rails or edges |
| Heavy-duty adhesive mounts | Use strong adhesive for quick setup |
These options save time and protect your truck’s integrity while keeping your solar system stable. Considering installation flexibility, these non-penetrating mounts are especially suitable for off-grid adventures.
Secure Mounting Techniques
Selecting the right mounting system is essential for guaranteeing your solar panels stay secure and perform reliably in off-grid conditions. You need a method that withstands road vibrations, wind, and rough terrain. Rigid mounts with aluminum brackets or Z-brackets offer a sturdy, permanent solution but require drilling into your truck bed. Semi-flexible panels can be adhered with high-bond VHB tape or secured with butyl tape and screws through grommets, offering more flexibility. Bed rails or roof rack systems provide non-penetrating options that reduce water intrusion risks. Drill-free mounts with strong adhesives are ideal for temporary setups or lightweight panels. Whichever you choose, ensure all hardware is tight and corrosion-resistant to maintain long-term stability and safety during your off-grid adventures. Additionally, selecting a mounting system designed for off-grid use ensures durability and safety in challenging conditions.
Flexibility and Adjustability
Choosing the right mounting system for your truck bed solar panels depends on how much flexibility and adjustability you need. If you want to optimize sun exposure throughout the day, consider adjustable tilting mounts that let you change panel angles easily. Clamp-on or semi-flexible panels offer quick removal and repositioning, ideal for varying off-grid conditions. Bed rails or roof rack systems provide a stable base with some room for adjustment, without drilling into the truck bed. Drill-free mounts with strong adhesives are suitable for temporary setups but limit adjustability. Think about your travel patterns and how often you’ll need to reposition panels. Incorporating professional-grade components can enhance durability and performance, ensuring your system remains reliable during extended off-grid trips. Balancing flexibility with ease of installation ensures you get the most efficient solar performance while maintaining convenience during your trips.
Wiring and Connecting Your Solar Components Safely
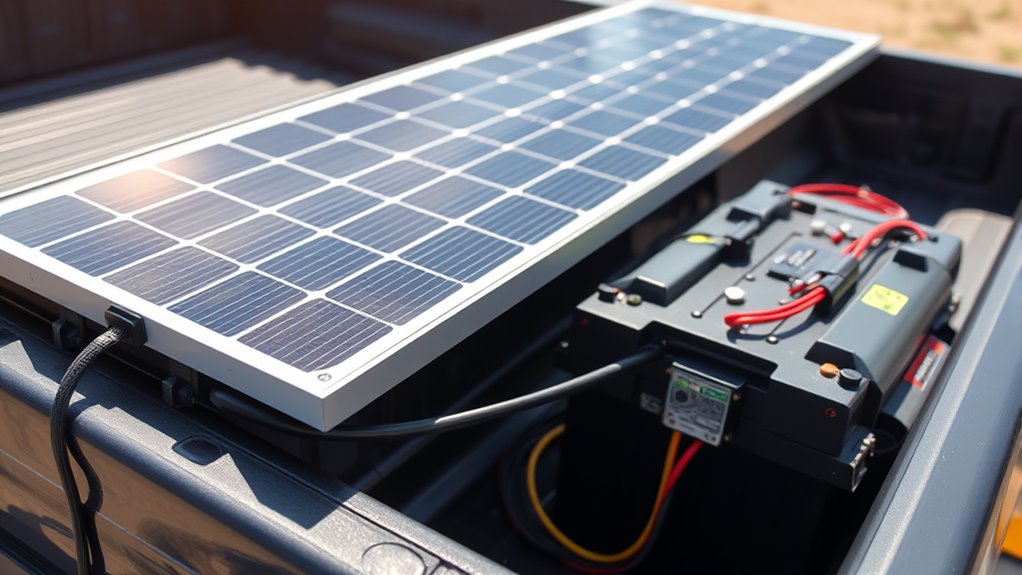
Wiring your truck bed solar system safely begins with planning a clear and organized layout for all connections. Start by mapping out where each component will go, keeping cables short to reduce voltage drop. Use weatherproof MC4 connectors to join panels, ensuring secure, waterproof connections. Route cables through existing bed liner holes or channels, sealing all entry points with butyl tape or specialized sealants to prevent water intrusion. Secure cables with cable ties and conduit, avoiding sharp edges and moving parts. Clearly mark positive and negative wires to prevent misconnections. Install fuses or circuit breakers close to the battery terminals for short-circuit protection, and verify all connections before powering up. Proper wiring not only enhances safety but also maximizes system performance and longevity. Additionally, employing proper wiring techniques ensures the durability and safety of your solar setup over time.
Proper Placement and Orientation for Maximum Sun Exposure
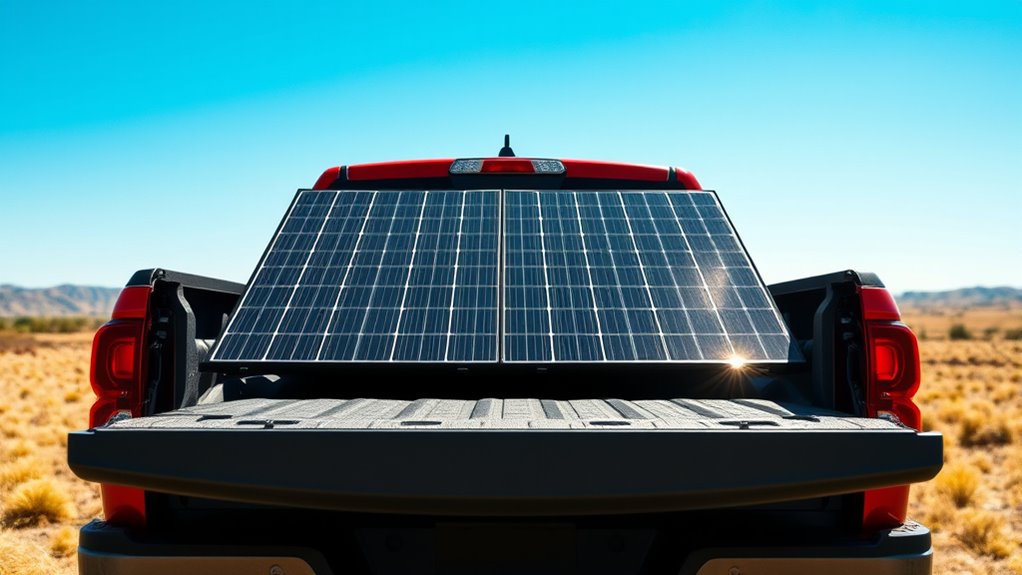
To get the most energy from your solar panels, you need to position them at the right angle and orientation. Make sure they face the sun directly, avoiding any shading from nearby objects or truck accessories. Adjusting the panel tilt and keeping obstructions clear will maximize your system’s efficiency. Additionally, understanding solar panel placement can help you optimize energy collection during your off-grid trips.
Optimal Panel Angles
Maximizing your solar panel’s efficiency depends heavily on getting the right angle and orientation. To capture the most sunlight, position your panels to face the sun directly, typically southward if you’re in the northern hemisphere. Adjust the tilt based on your latitude; higher latitudes benefit from steeper angles, while lower latitudes need flatter setups. During peak sunlight hours, panels should be perpendicular to the sun’s rays. If your mounting system allows, tilt your panels seasonally—more vertical in winter, flatter in summer—to optimize exposure. Avoid mounting panels flat or in shaded spots. Proper angling ensures maximum sunlight absorption throughout the day, which boosts energy production and keeps your off-grid setup running smoothly. Simple, trustworthy guidance can help you achieve optimal placement and orientation for your solar panels.
Avoiding Shading Blocks
Shading from objects like truck accessories, trees, or nearby structures can considerably reduce your solar panel’s efficiency. To maximize sun exposure, carefully select a mounting spot free from shade during peak sunlight hours. Position panels away from tall accessories such as antennas, racks, or toolboxes that might cast shadows. Consider the sun’s path throughout the day and season, placing panels where they won’t be blocked in the early morning or late afternoon. Use adjustable mounts to fine-tune orientation and avoid shaded areas as the sun moves. Regularly inspect the area for new obstructions like growing foliage or added equipment. Remember, even partial shading can diminish your system’s output by up to 80%, so prioritize clear, unobstructed placement for ideal performance. Understanding solar panel orientation and proper placement ensures you get the most out of your off-grid power setup.
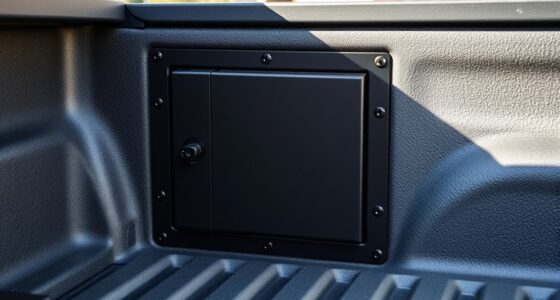
Ensuring Battery Safety and Efficient Storage Solutions
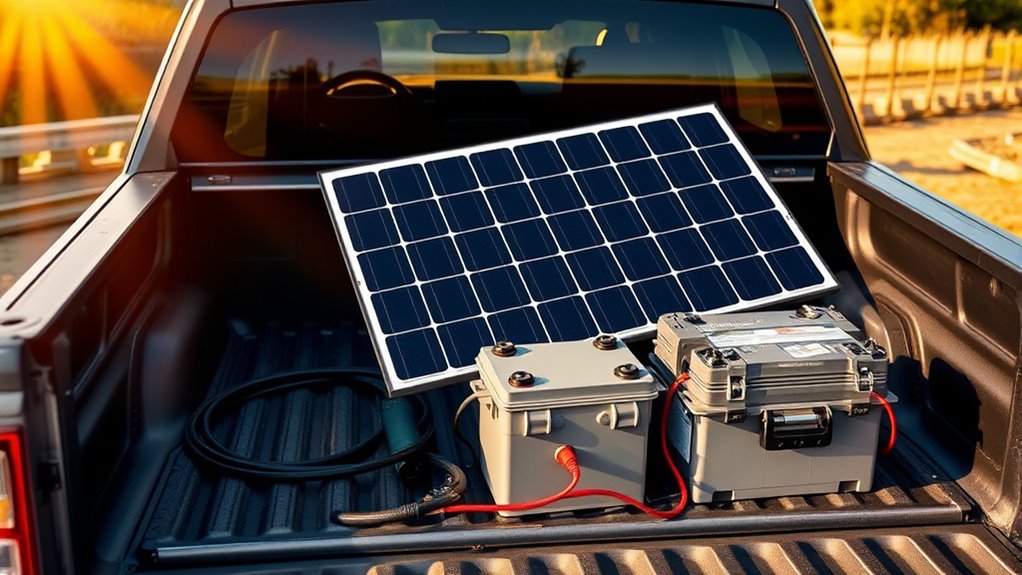
Ensuring battery safety and efficient storage starts with selecting the right enclosure and placement. Choose a vented, lockable container designed for batteries to prevent movement and contain any potential leaks. Mount the enclosure securely to the truck bed or frame to stop shifting during travel. Lithium iron phosphate batteries are ideal because they’re lighter and more stable, reducing thermal risks. Install fuses or circuit breakers close to the battery terminals for short-circuit protection. Make sure the battery area is well-ventilated to dissipate heat and prevent thermal runaway. Keep batteries away from direct sunlight and moisture, and avoid stacking objects on top. Regularly inspect connections and enclosure integrity to maintain safety and maximize battery lifespan. Proper placement and protective measures safeguard your system and ensure reliable off-grid power. Proper ventilation and maintenance are essential for preventing thermal buildup and extending battery life.
Tips for Maintaining and Optimizing Your Solar Setup

Regular maintenance is essential to keep your solar system operating at peak efficiency. Start by cleaning your panels regularly with a soft cloth and water to remove dirt, dust, and debris that can cut output by up to 25%. Inspect wiring, connectors, and mounting hardware for corrosion, loose connections, or damage, and tighten or replace components as needed. Monitor your battery performance with a battery monitor or charge controller display to catch issues early. Make sure vents and enclosures remain clear for proper airflow, preventing overheating. Adjust panel angles seasonally or with tilting mounts to maximize sun exposure. In conclusion, update your system’s software or firmware if applicable and keep a record of maintenance tasks to ensure consistent, reliable power.
Frequently Asked Questions
How Do I Prevent Water Intrusion Around Mounted Solar Panels?
To prevent water intrusion around your mounted solar panels, guarantee all entry points are sealed with high-quality butyl tape, Dicor, or Eternabond tape. Apply sealant liberally around brackets, grommets, and cable entry areas. Use weatherproof MC4 connectors, secure cables with conduit and ties, and double-check all seals during installation. Regularly inspect and maintain seals, reapplying as needed, especially after rough drives or extreme weather, to keep your system watertight.
What Gauge Wire Is Best for Long-Distance Runs?
For long-distance runs, use heavy gauge wire, ideally 6 AWG or larger, to minimize voltage drop and maximize power transfer. Thicker wire reduces resistance, ensuring your system stays efficient even over extended distances. Keep wire lengths as short as possible, and use high-quality connectors like MC4 for secure connections. Proper wire sizing and routing help your solar setup perform reliably, especially when running power from the panels to your batteries.
Can Semi-Flexible Panels Handle Extreme Weather Conditions?
Semi-flexible panels can handle extreme weather, but their durability varies. Remarkably, some high-quality models are designed to withstand wind speeds up to 150 mph and temperatures from -40°F to 185°F. You should choose panels with reinforced backing and waterproof seals, as they resist cracking, warping, and water intrusion. Regularly inspect them after storms, and avoid prolonged exposure to hail or heavy snow to ensure longevity in harsh conditions.
How Often Should I Clean My Solar Panels for Optimal Performance?
You should clean your solar panels at least once every three to six months for peak performance. If you’re in a dusty or polluted area, cleaning might be needed more often, like monthly. Use a soft cloth or sponge with water and a mild soap, avoiding abrasive materials that could scratch the surface. Regular cleaning ensures maximum sunlight absorption and prevents dirt buildup from reducing your system’s efficiency.
What Safety Precautions Are Essential When Installing Batteries?
When installing batteries, you should always wear safety glasses and gloves to protect against spills or sparks. Make sure the area is well-ventilated to prevent gas buildup, especially with lithium or AGM batteries. Double-check all connections for proper polarity to avoid short circuits. Use fuses or circuit breakers close to the battery terminals for safety. Keep batteries on a stable, non-flammable surface and avoid overcharging by monitoring voltage levels.
Conclusion
With the right setup, your truck bed transforms into a reliable off-grid power station, like a pocket full of sunshine ready to light up your adventures. By selecting quality panels, mounting them properly, wiring safely, and maintaining your system, you guarantee your solar setup works seamlessly whenever you hit the road. Think of it as planting seeds for endless energy—watch your off-grid journeys flourish with power that’s as steady as the sunrise.